
Problem
This article walks through the steps needed to adjust geometry so that it is coincident with the floor in SOLIDWORKS Visualize.
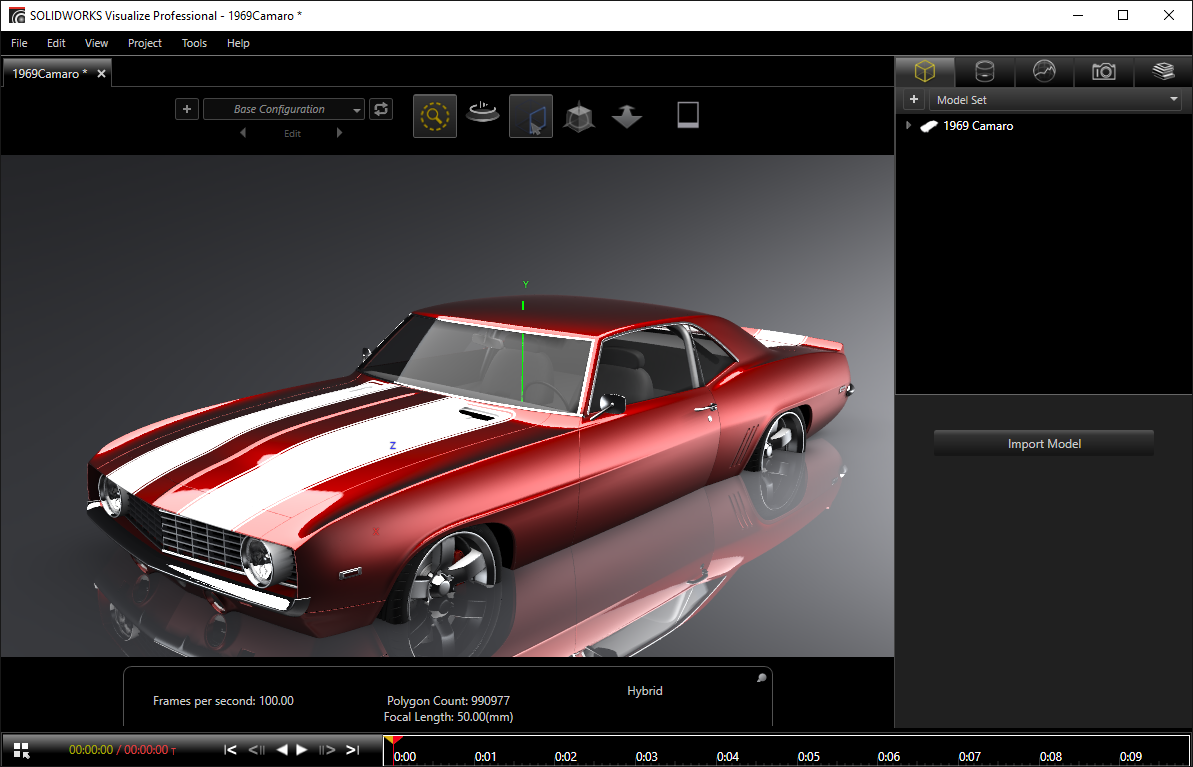
As shown in the image above, it is possible to place geometry in Visualize to be concealed beneath the floor. Geometry can be translated to float above the floor as well, though this does not hide anything. Depending on the file itself, geometry may also be automatically placed above or below the floor after an initial import. The simplest method to realign geometry with the floor is to follow the steps listed below.
Solution
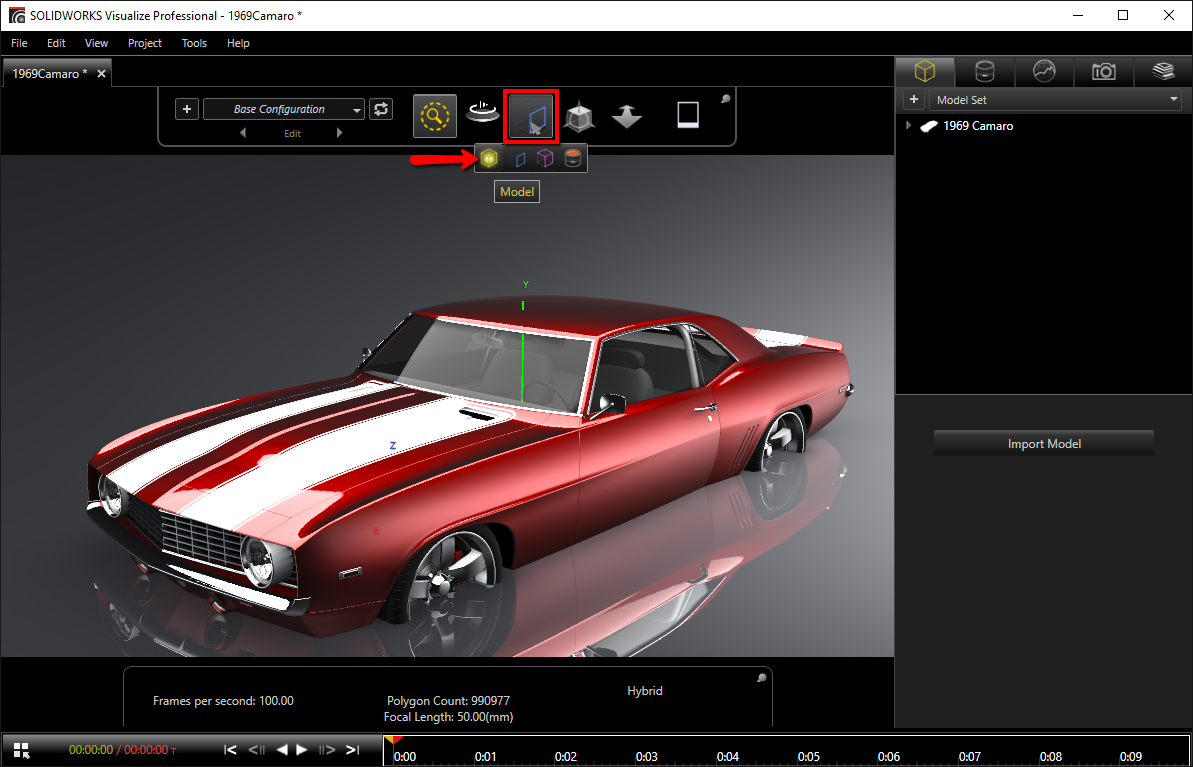
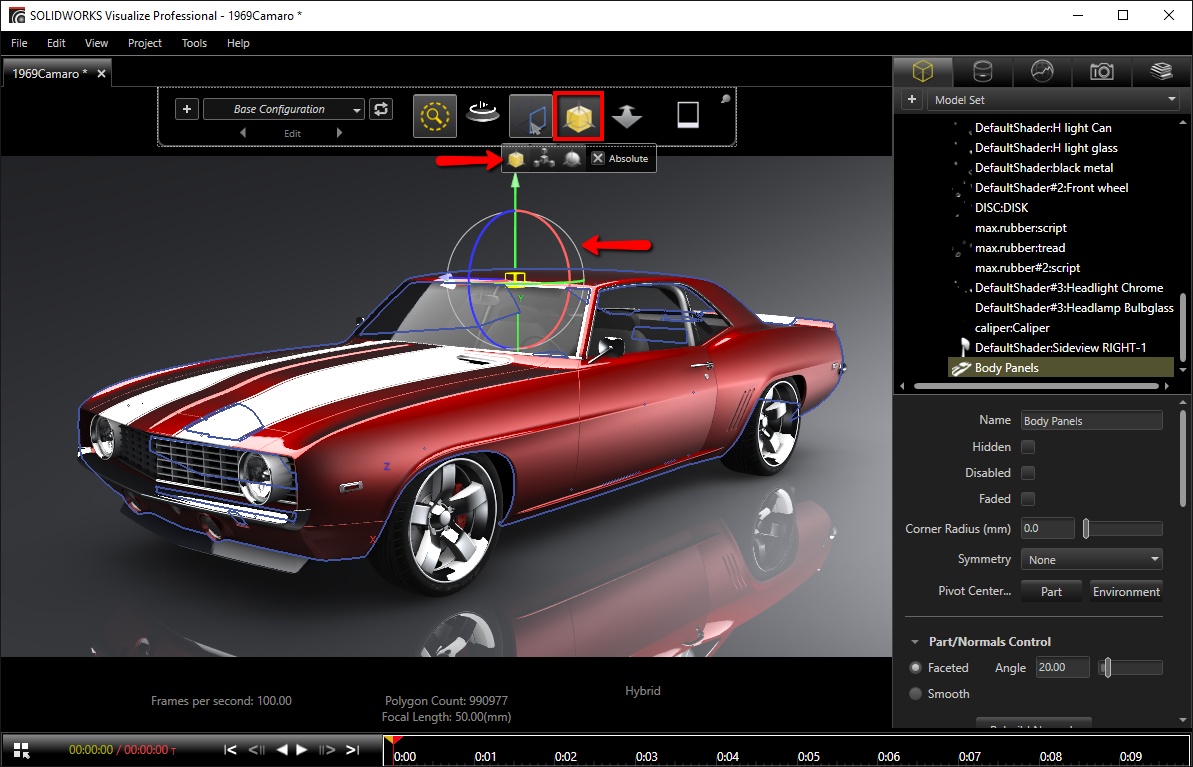
1. Select the "Model" Selection Tool, the location of which is shown in the following illustration.
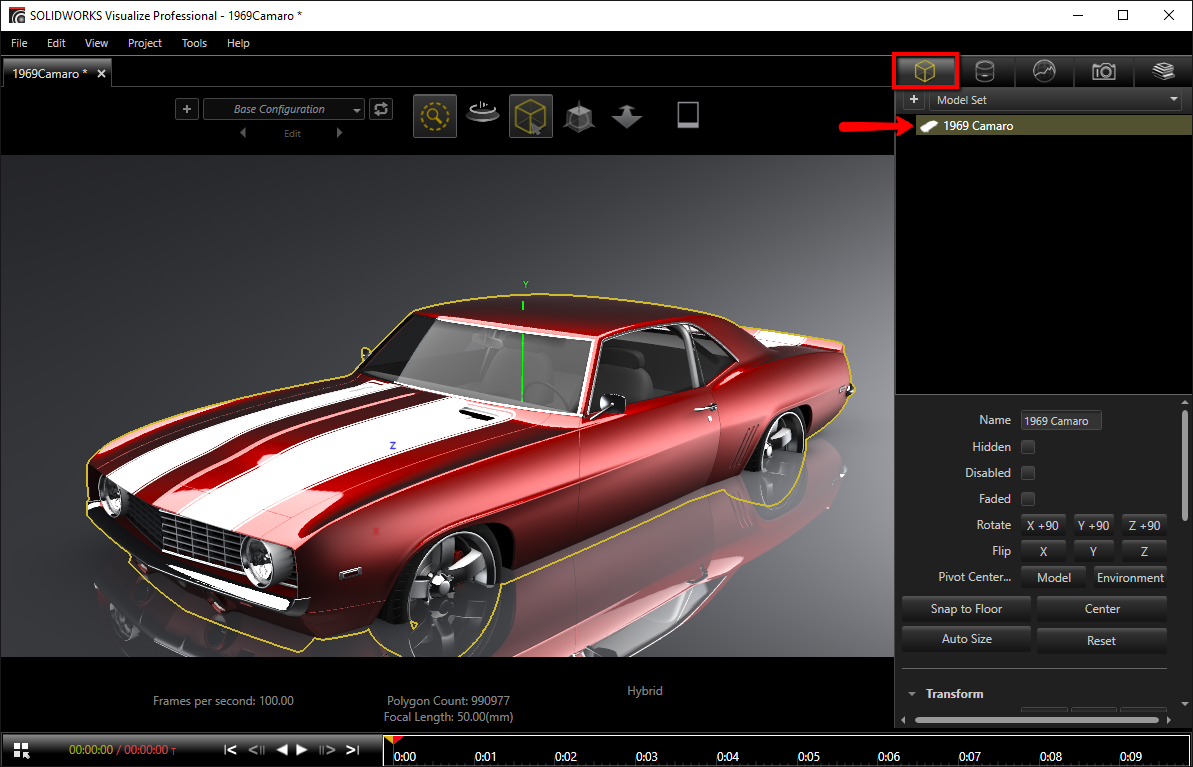
2. Navigate to the "Objects" Palette tab. From here, you can either select the geometry in question by clicking on it in the Viewport or by choosing it in the "Objects" list.
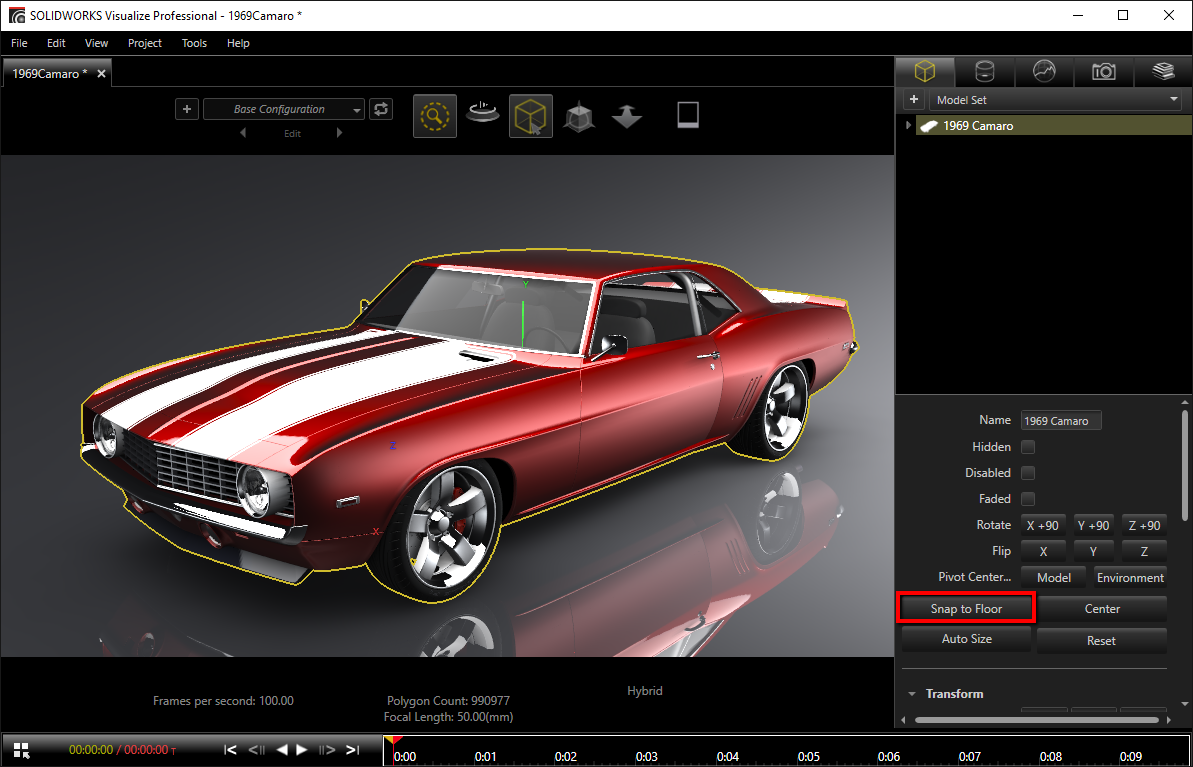
3. After selecting the geometry, click on the "Snap to Floor" option in the "Objects" Palette tab. Once you have done so, the selected geometry should become coincident with the floor, as pictured here:
Note that this method can only be applied to a top-level model, and not individual parts. If you would like to manually move parts in Visualize, you can do so by selecting the "Part" Selection Tool > Selecting the part > enabling the "Move" Object Manipulation Tool > Using the Pivot that appears.
For further technical support, please contact Hawk Ridge Systems at 877.266.4469 for the U.S. or 866.587.6803 for Canada and support@hawkridgesys.com.
Comments
Article is closed for comments.