
Problem
This article describes how to save and locate the SOLIDWORKS installation logs, which are created during the installation process for each major version and service pack. These logs can be useful in determining the cause of any errors encountered when attempting to install SOLIDWORKS by providing the logs to Technical Support.
Solution 1: Saving the Logs After an Installation Error
If an error is encountered during the installation or upgrade of SOLIDWORKS, the Installation Manager will allow the Installation Logs to be saved for troubleshooting purposes. Follow the steps below:
- Click "Save Logs for Support"
-
Choose a location to save the Installation logs to
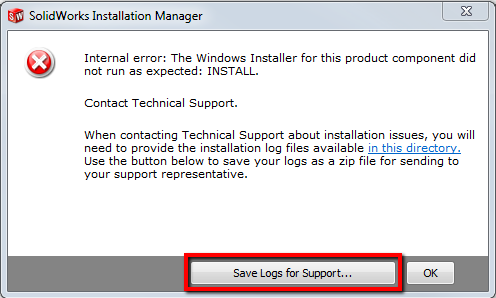
- Create a new Ticket with Technical Support and upload the installation logs
If this prompt does not appear when an error is encountered, or if the log files were not saved using this method, they can be manually found and saved by following the steps in the next section.
Solution 2: Manually Locating the Logs
The installation logs that are automatically created each time a new version of SOLIDWORKS is installed can be located and saved by following the steps below:
- Open Windows File Explorer
-
In the File Path bar, type in "%appdata%" without the quotation marks and hit "Enter" on the keyboard
-
Click on the folder named "Roaming" that appears as a result, if it was not already open
- From the Roaming folder, navigate to \SOLIDWORKS\Installation Logs
-
Find the folder that corresponds to the version that was installing when the error was encountered (ex: 2026 SP3.2)
-
Right-click on the folder and select "Send to > Compressed (zipped) folder".
- Name the new zipped folder when prompted
- Create a new Ticket with Technical Support and upload the installation logs
For additional support, existing customers can submit a ticket or new customers can contact Hawk Ridge Systems.
Comments
Article is closed for comments.