This article covers how to export a sliced print job from Eiger. Once exported, the print job can be taken directly to a printer via USB drive or sent to another individual for printing on their compatible Markforged systems.
In order to export an offline print job from Eiger, the original STL file will first need to be fully sliced by Eiger. This can be done by setting your desired print settings and then clicking on the Save option within your Eiger Part View.
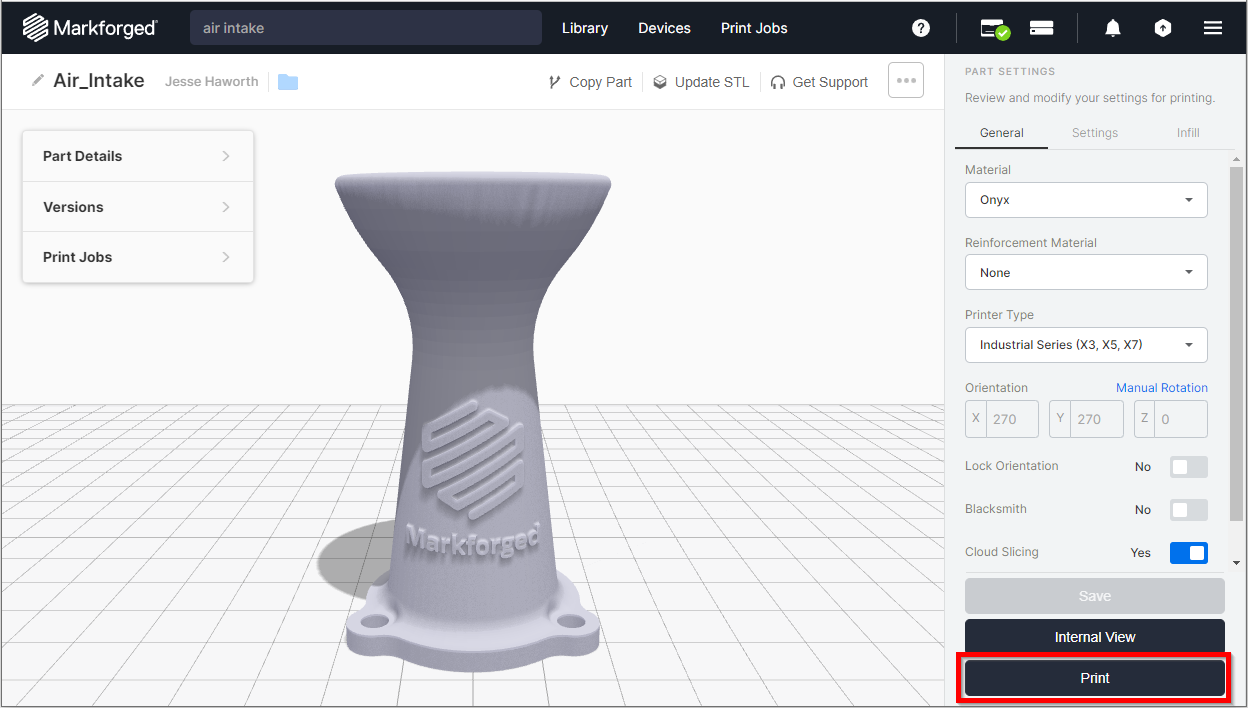
Once a part is ready for printing, you can begin the export process by clicking on the Print option as shown below.
Once reaching the final print preparation area, you can open the Select Printer drop down menu. When this menu is expanded, you will see the option for Export Build.
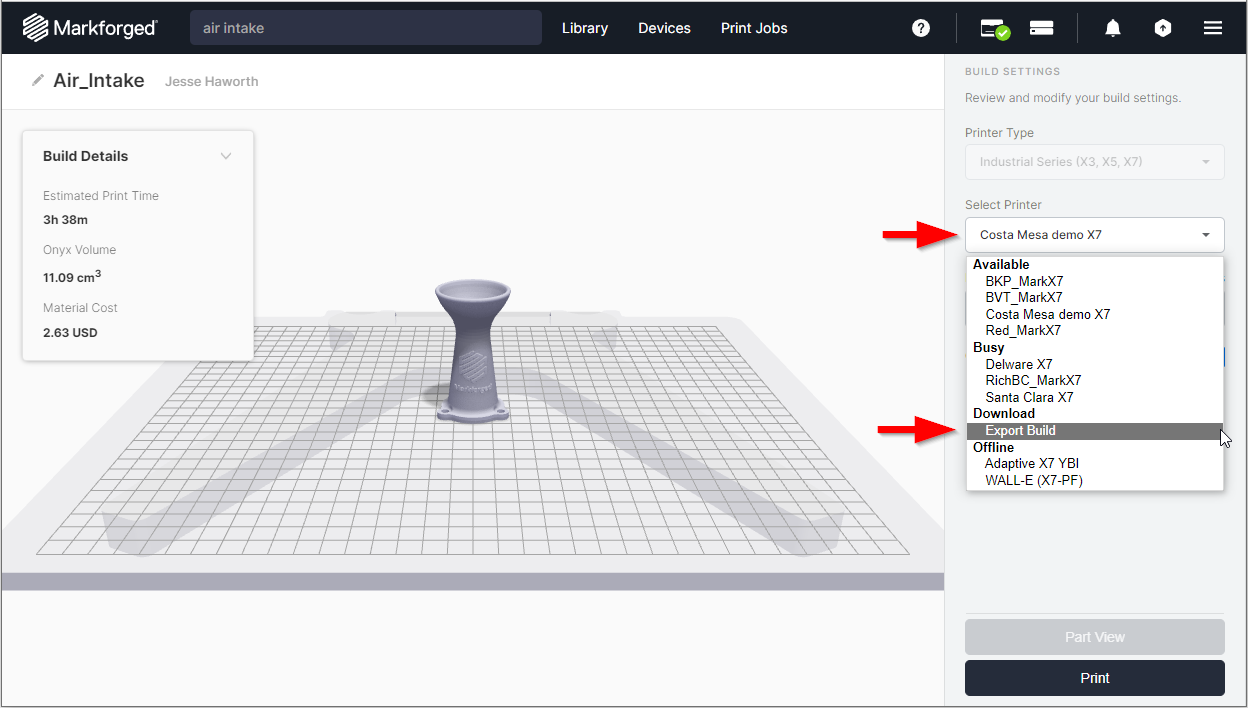
Selecting the Export Build option will replace your Print button with an Export Build prompt, as shown in the illustration below.
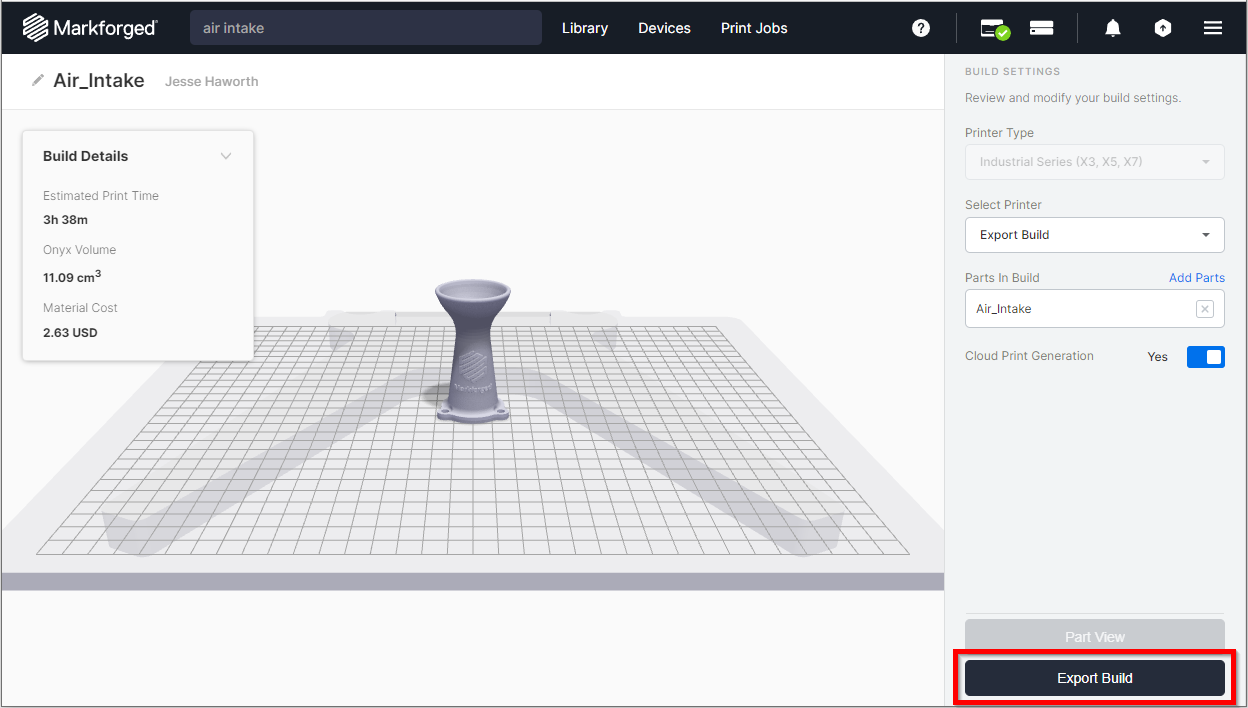
Once the final Export Build confirmation is selected, Eiger will generate a local .MFP (Markforged Print) file. By default, this file will be placed in your Windows Downloads folder. If utilizing the cloud version of Eiger, your browser should give you an option to directly open the file location of this exported print job.
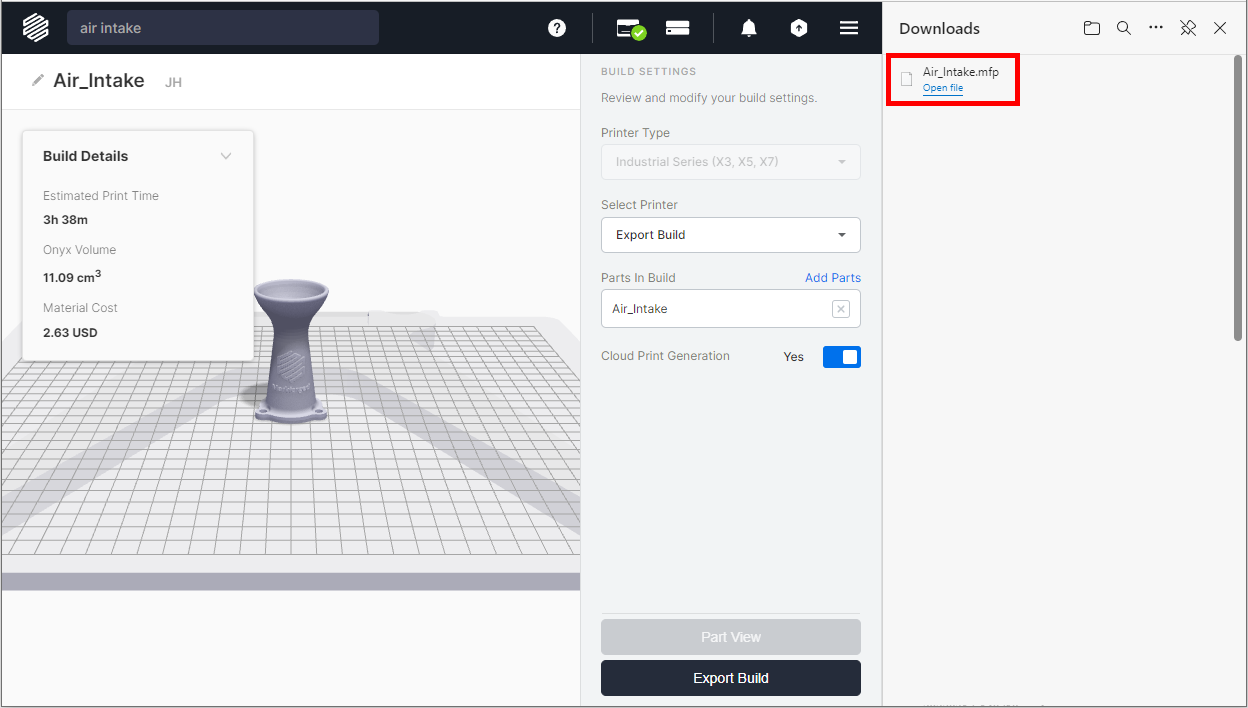
Note that the name of this local file is based on the name of your build in the final Eiger print preparation area. The name of this exported file can be changed as desired without impacting the print itself.
Printing an Offline Job
Once you have your .MFP file, you can transfer it to a FAT32 formatted USB drive or load it onto your printer via USB cable. Note that the .MFP file will need to be on the top level of your USB drive (not organized into a Windows folder) in order for the printer to recognize it.
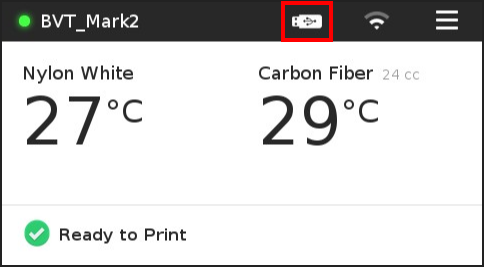
When your USB drive or cable is plugged into the printer, you should see the External Storage icon appear at the top of your UI. Select it to be taken directly to the Storage area of your printer.
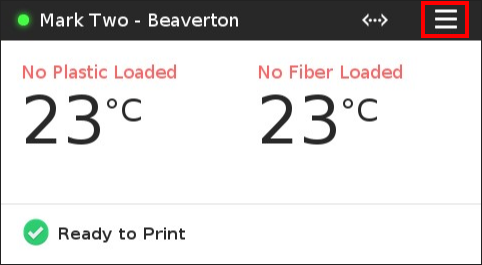
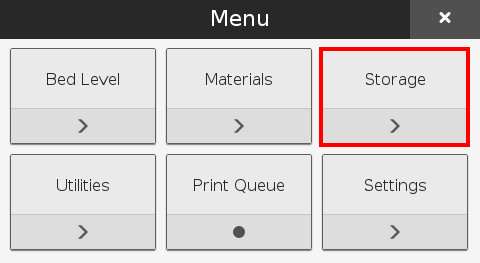
Note that the Storage area can also be accessed from your printer Menu > Storage.
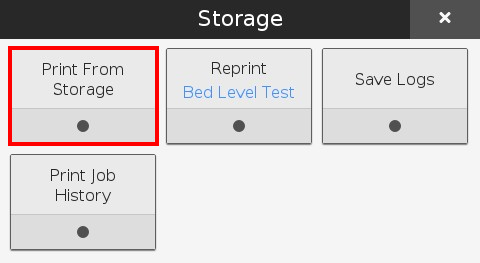
Once you are in the Storage area, you can select your print job by navigating to the Print From Storage option! If you have multiple .MFP files stored, you can select which one to print from this area.
If you have any questions or issues with the steps listed in this article, please contact 3DPSupport@hawkridgesys.com.
Comments
Article is closed for comments.