This article will walk you through the process of clearing an exhaust clog on your Sinter 2. Most clogs are caused when the area around the exhaust filters build up with wax, but over time the wax will make it past the filters, causing clog further down. If a Sinter run fails due to a clog, it is important to leave the Sinter door closed unless otherwise specified, since the parts could be in a powdered state.
Safety First
Routine Maintenance
Clearing an Exhaust Clog


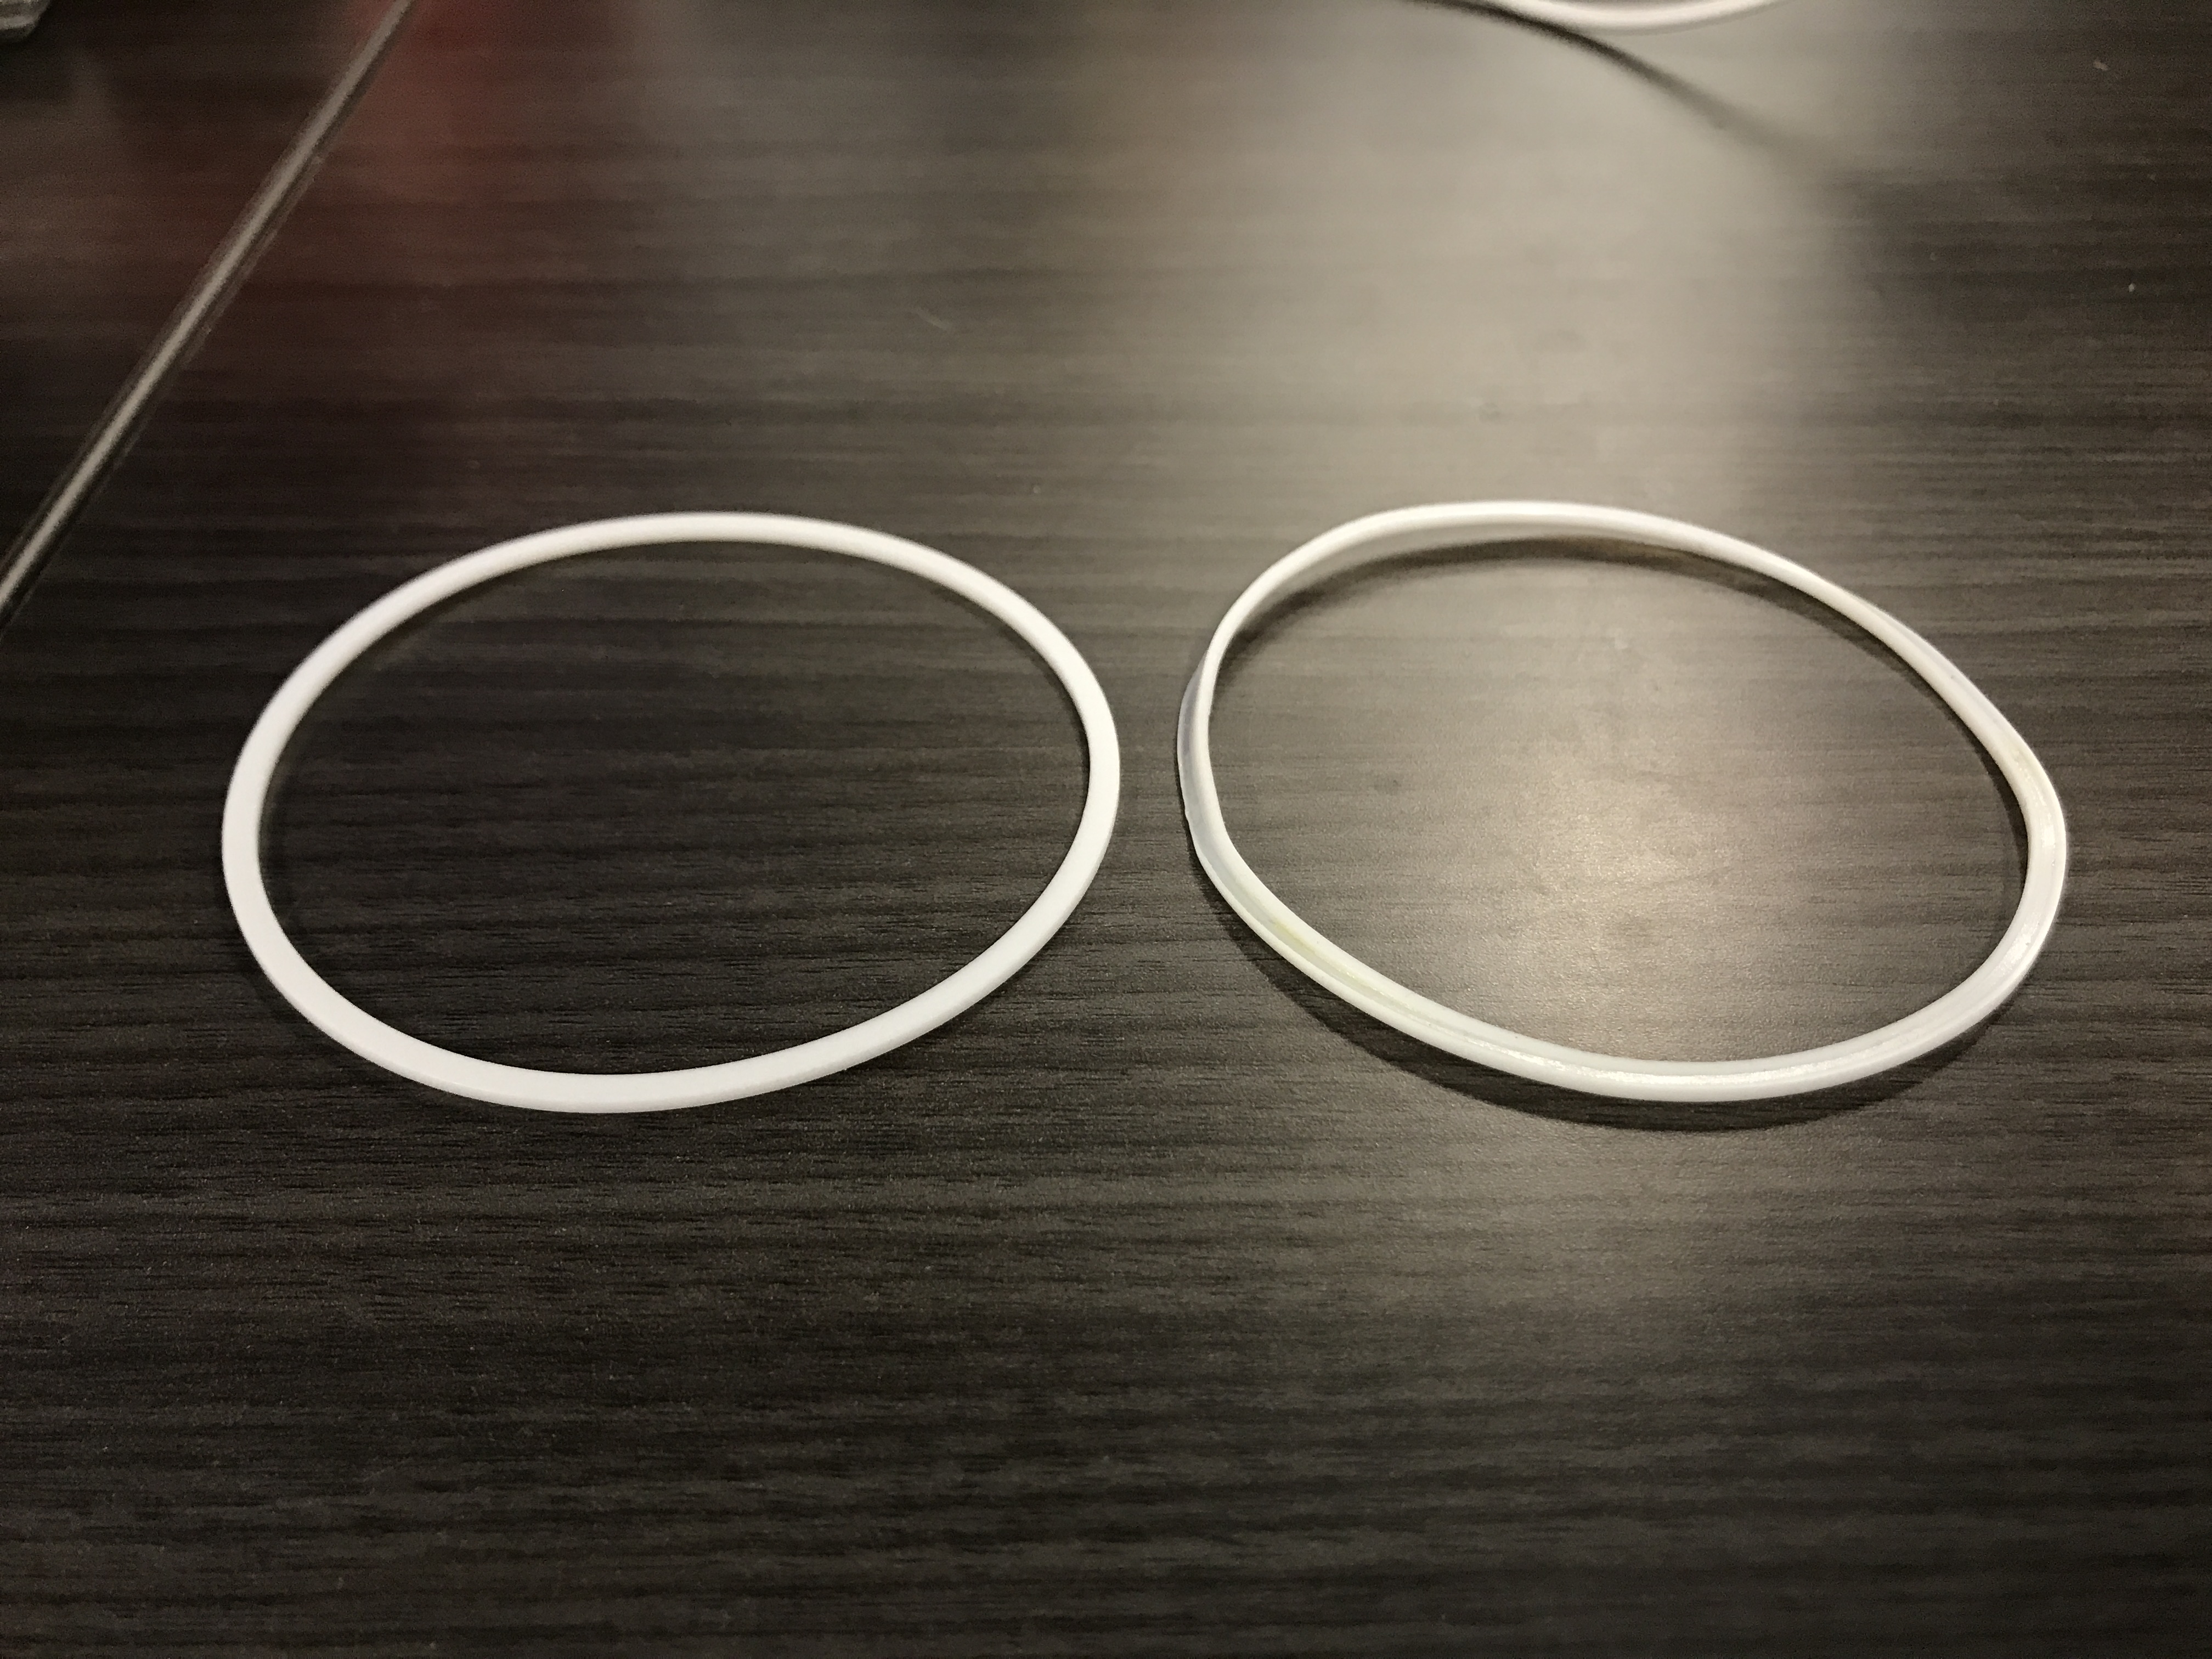 A Good Gasket (Left) vs. a Bad Gasket (right)
Safety First
Incompletely sintered parts can be in a powder state which can present a respiratory hazard. If a sinter run fails during the debinding stage, the touchscreen will display a red dialogue warning indicating that the parts are in powder state. DO NOT OPEN THE DOOR.
As a safety feature, in this state, the furnace is only capable of performing a Recovery Run and other functions/utilities are limited. If present, please acknowledge this warning so that the following troubleshooting steps can be completed.
Once the parts have been completely sintered and cooled, the furnace will be safe to open. Always wear nitrile gloves when handling the exhaust filters.
Routine Maintenance
At present, we recommend routinely breaking down and cleaning the exhaust assembly approximately every 3 sinter runs.
Clearing an Exhaust Clog
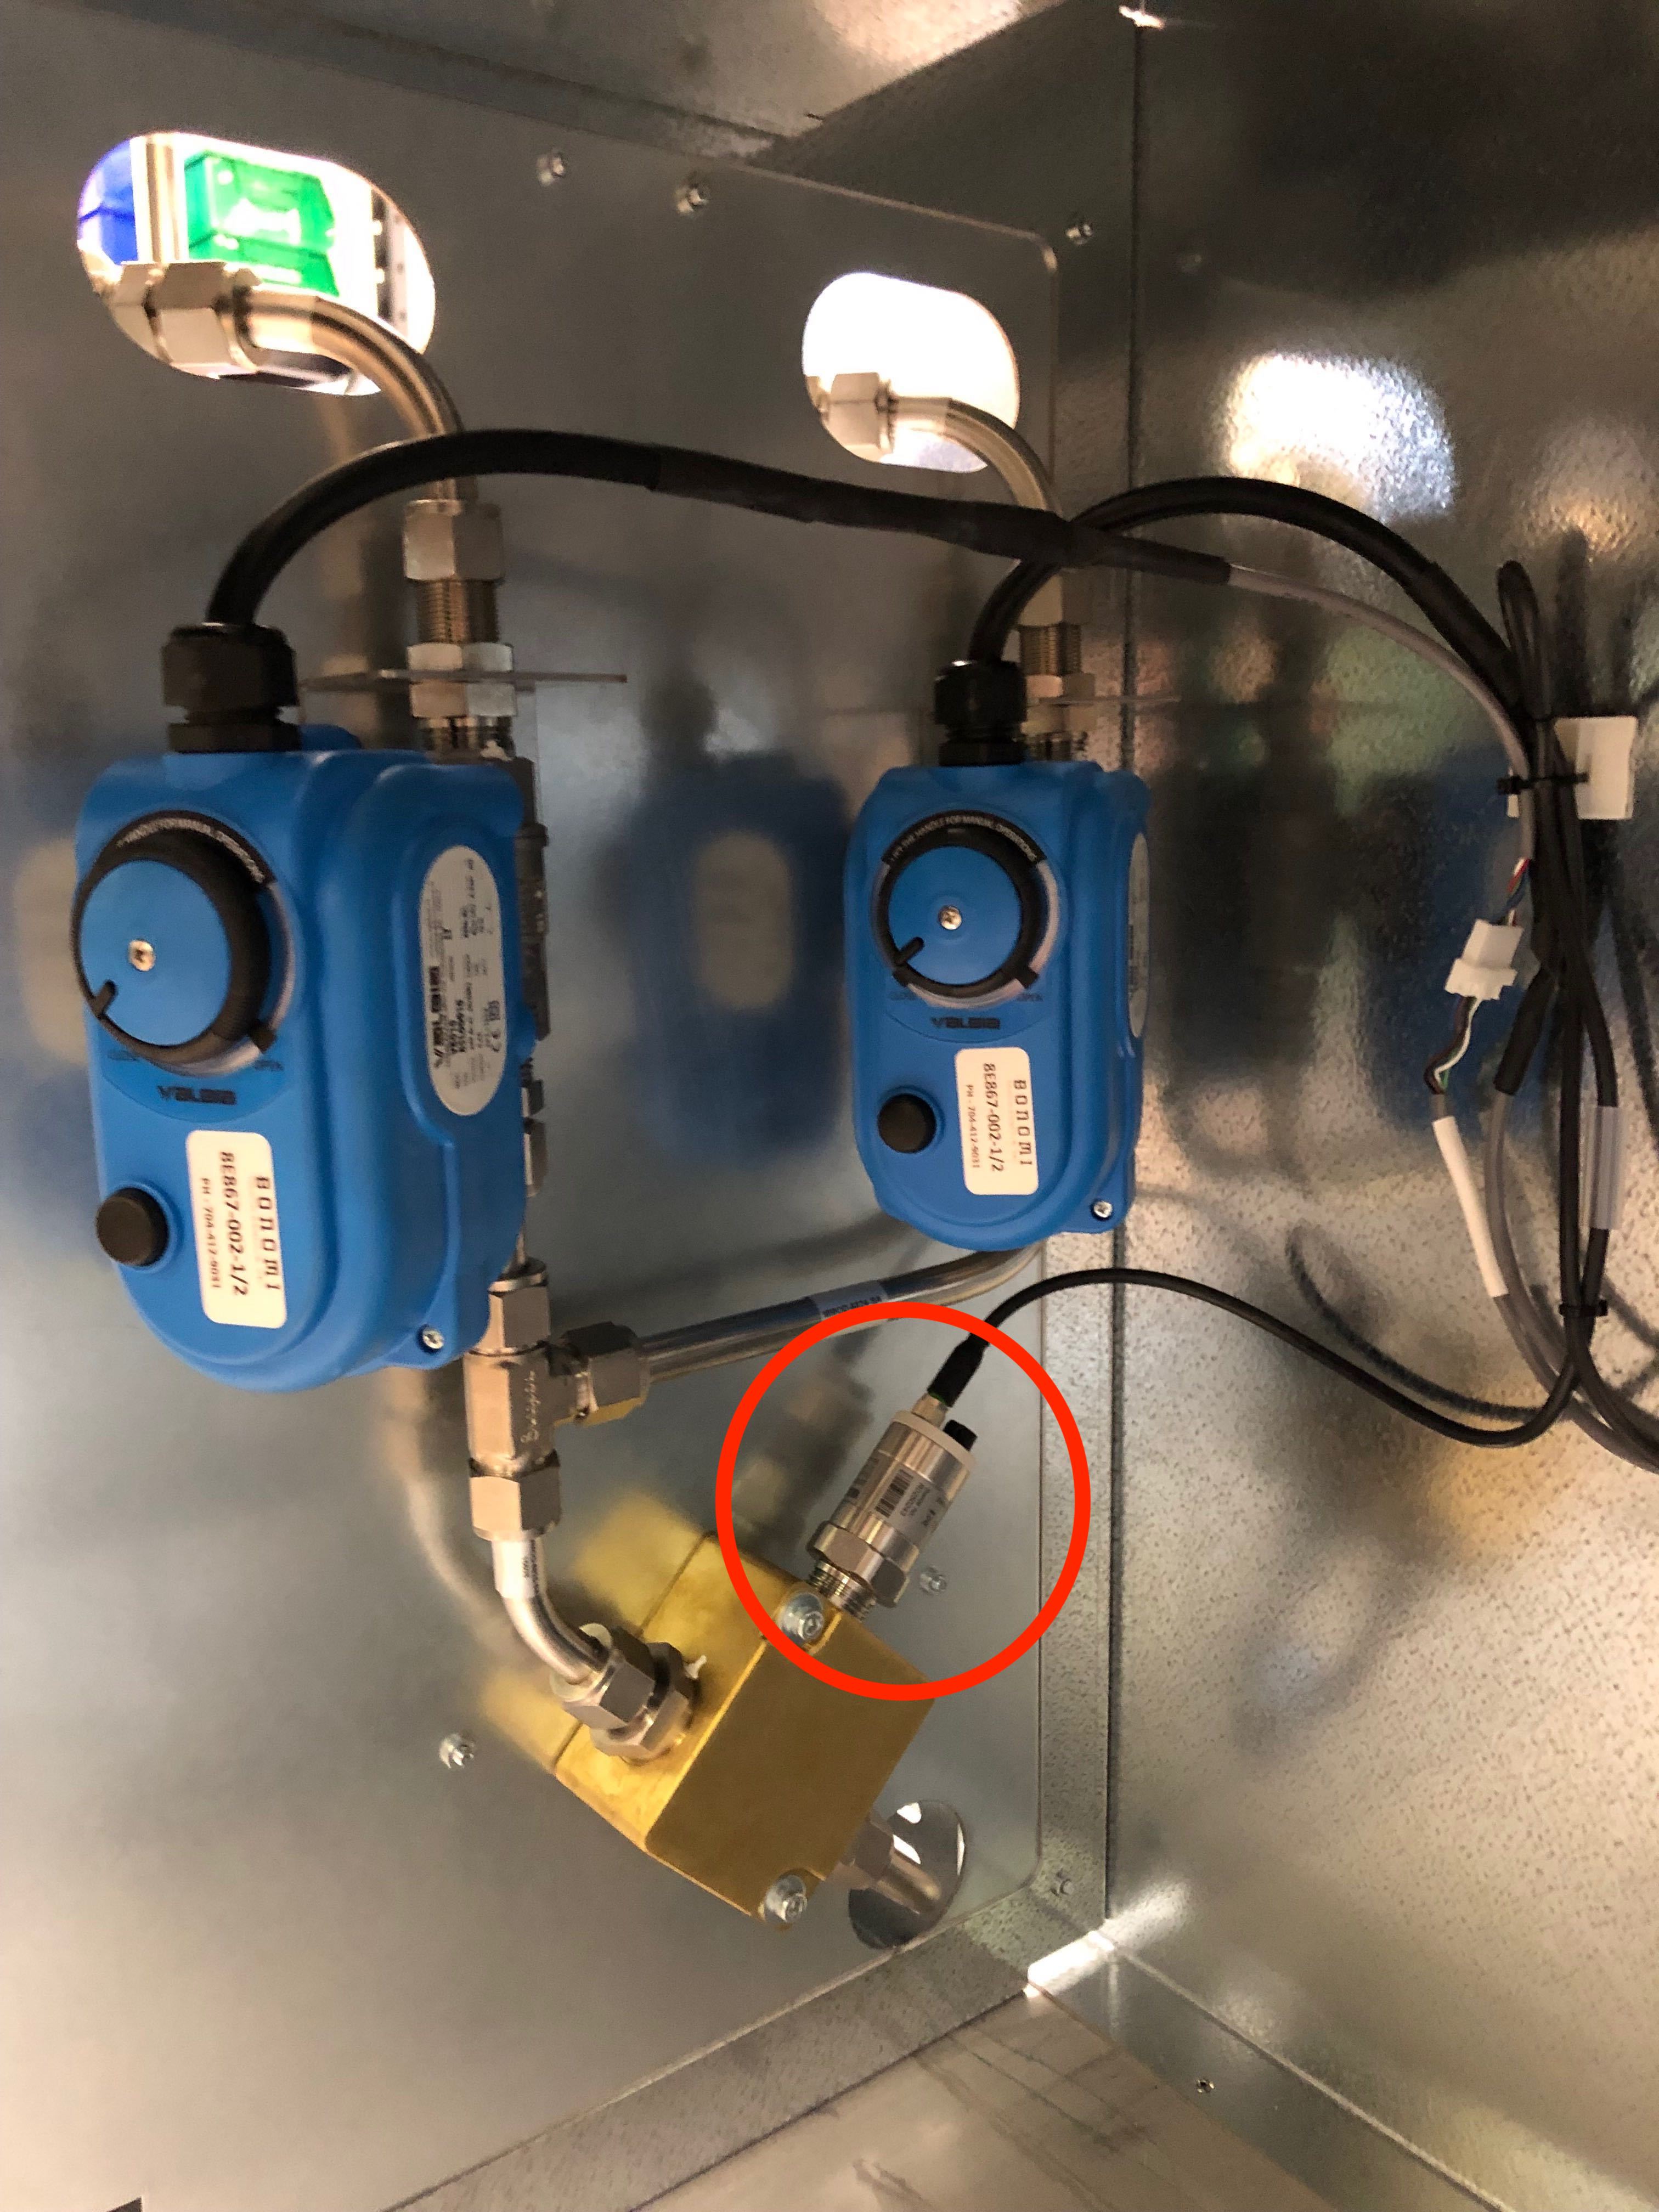
The ADC_ERR_HIGH error for the Pressure Process sensor indicates a clog in the exhaust system.
- Turn off the flow of mix and inert gas, then turn off power to the furnace by flipping the breaker on the front panel.
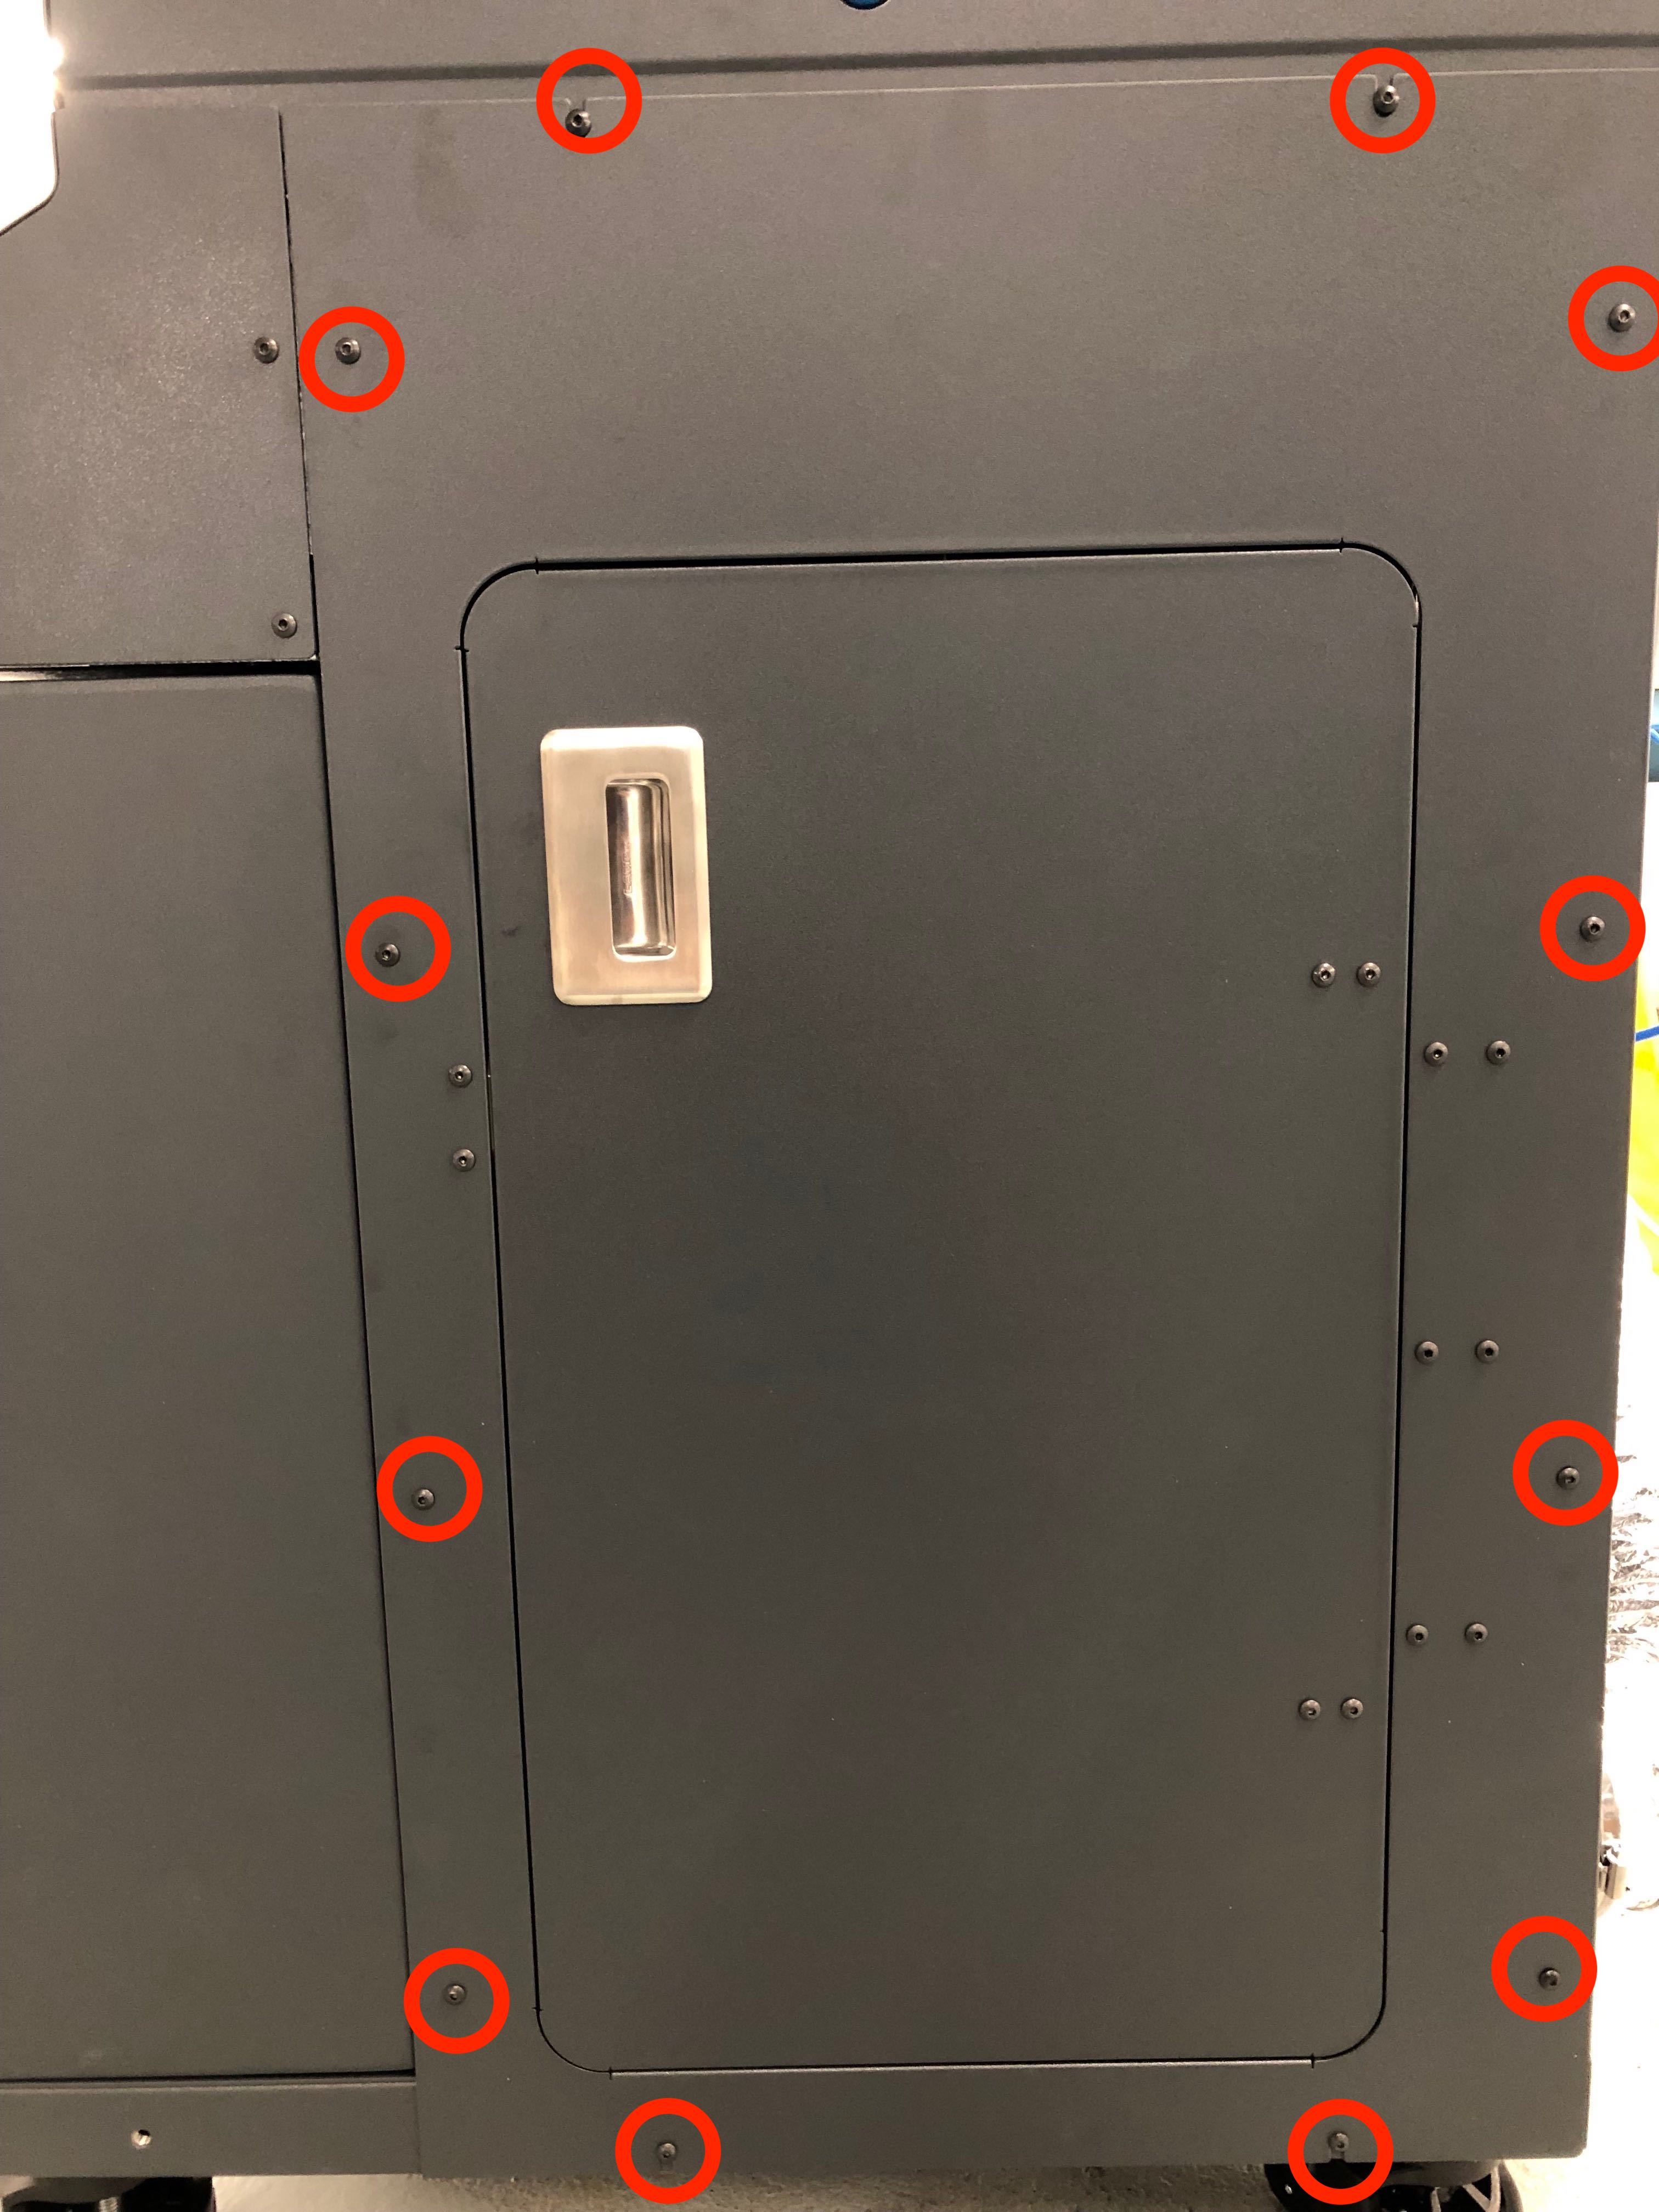
- Open the lower right sheet metal panel to access the exhaust filter canisters.
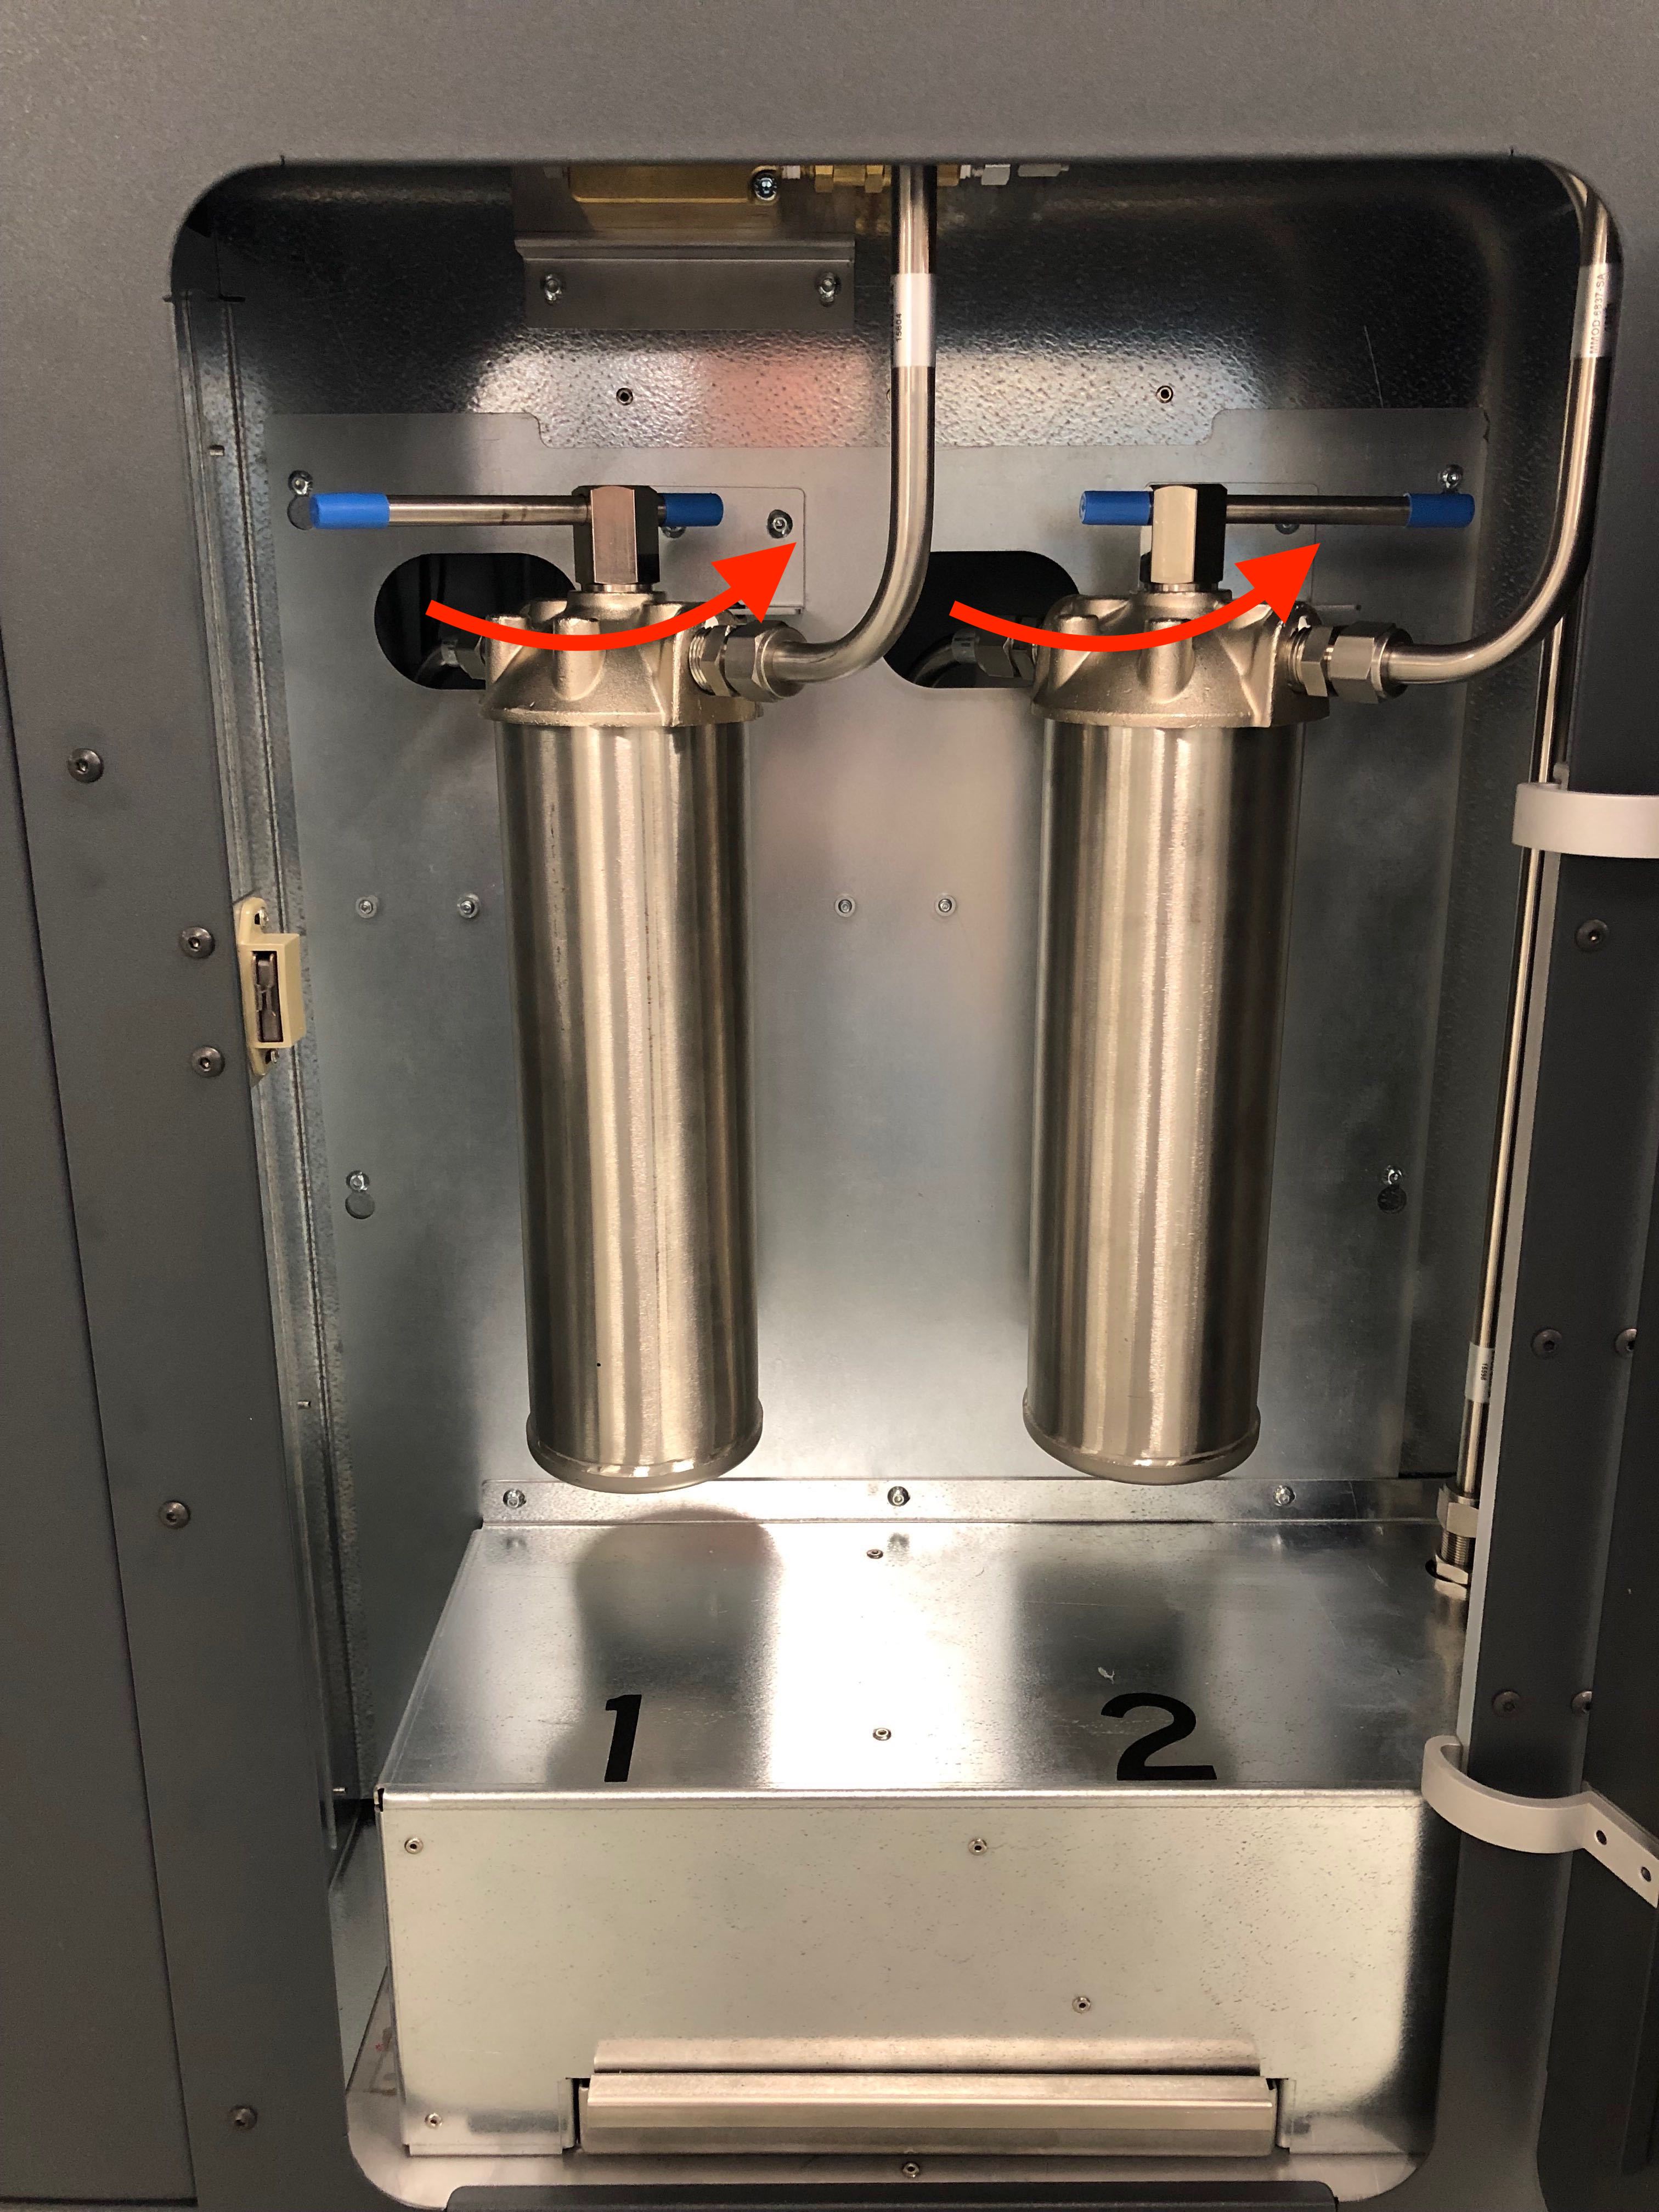
- Remove the exhaust filter canisters by unscrewing the tee handle of each filter, and safely dispose of the clogged filters. For better access, remove the lower exhaust panel by removing the 12 screws using a 3mm hex driver.
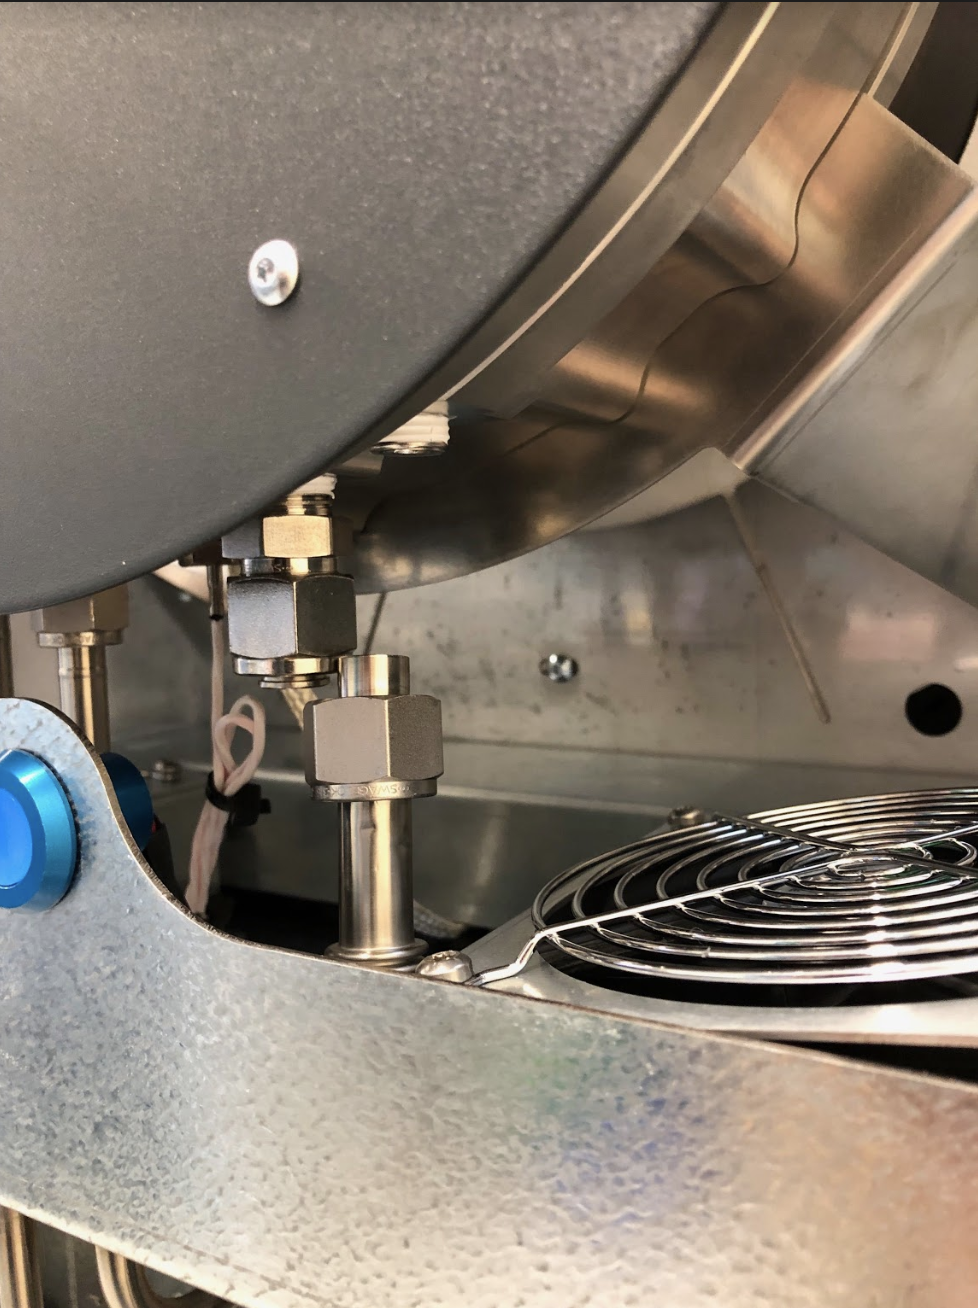
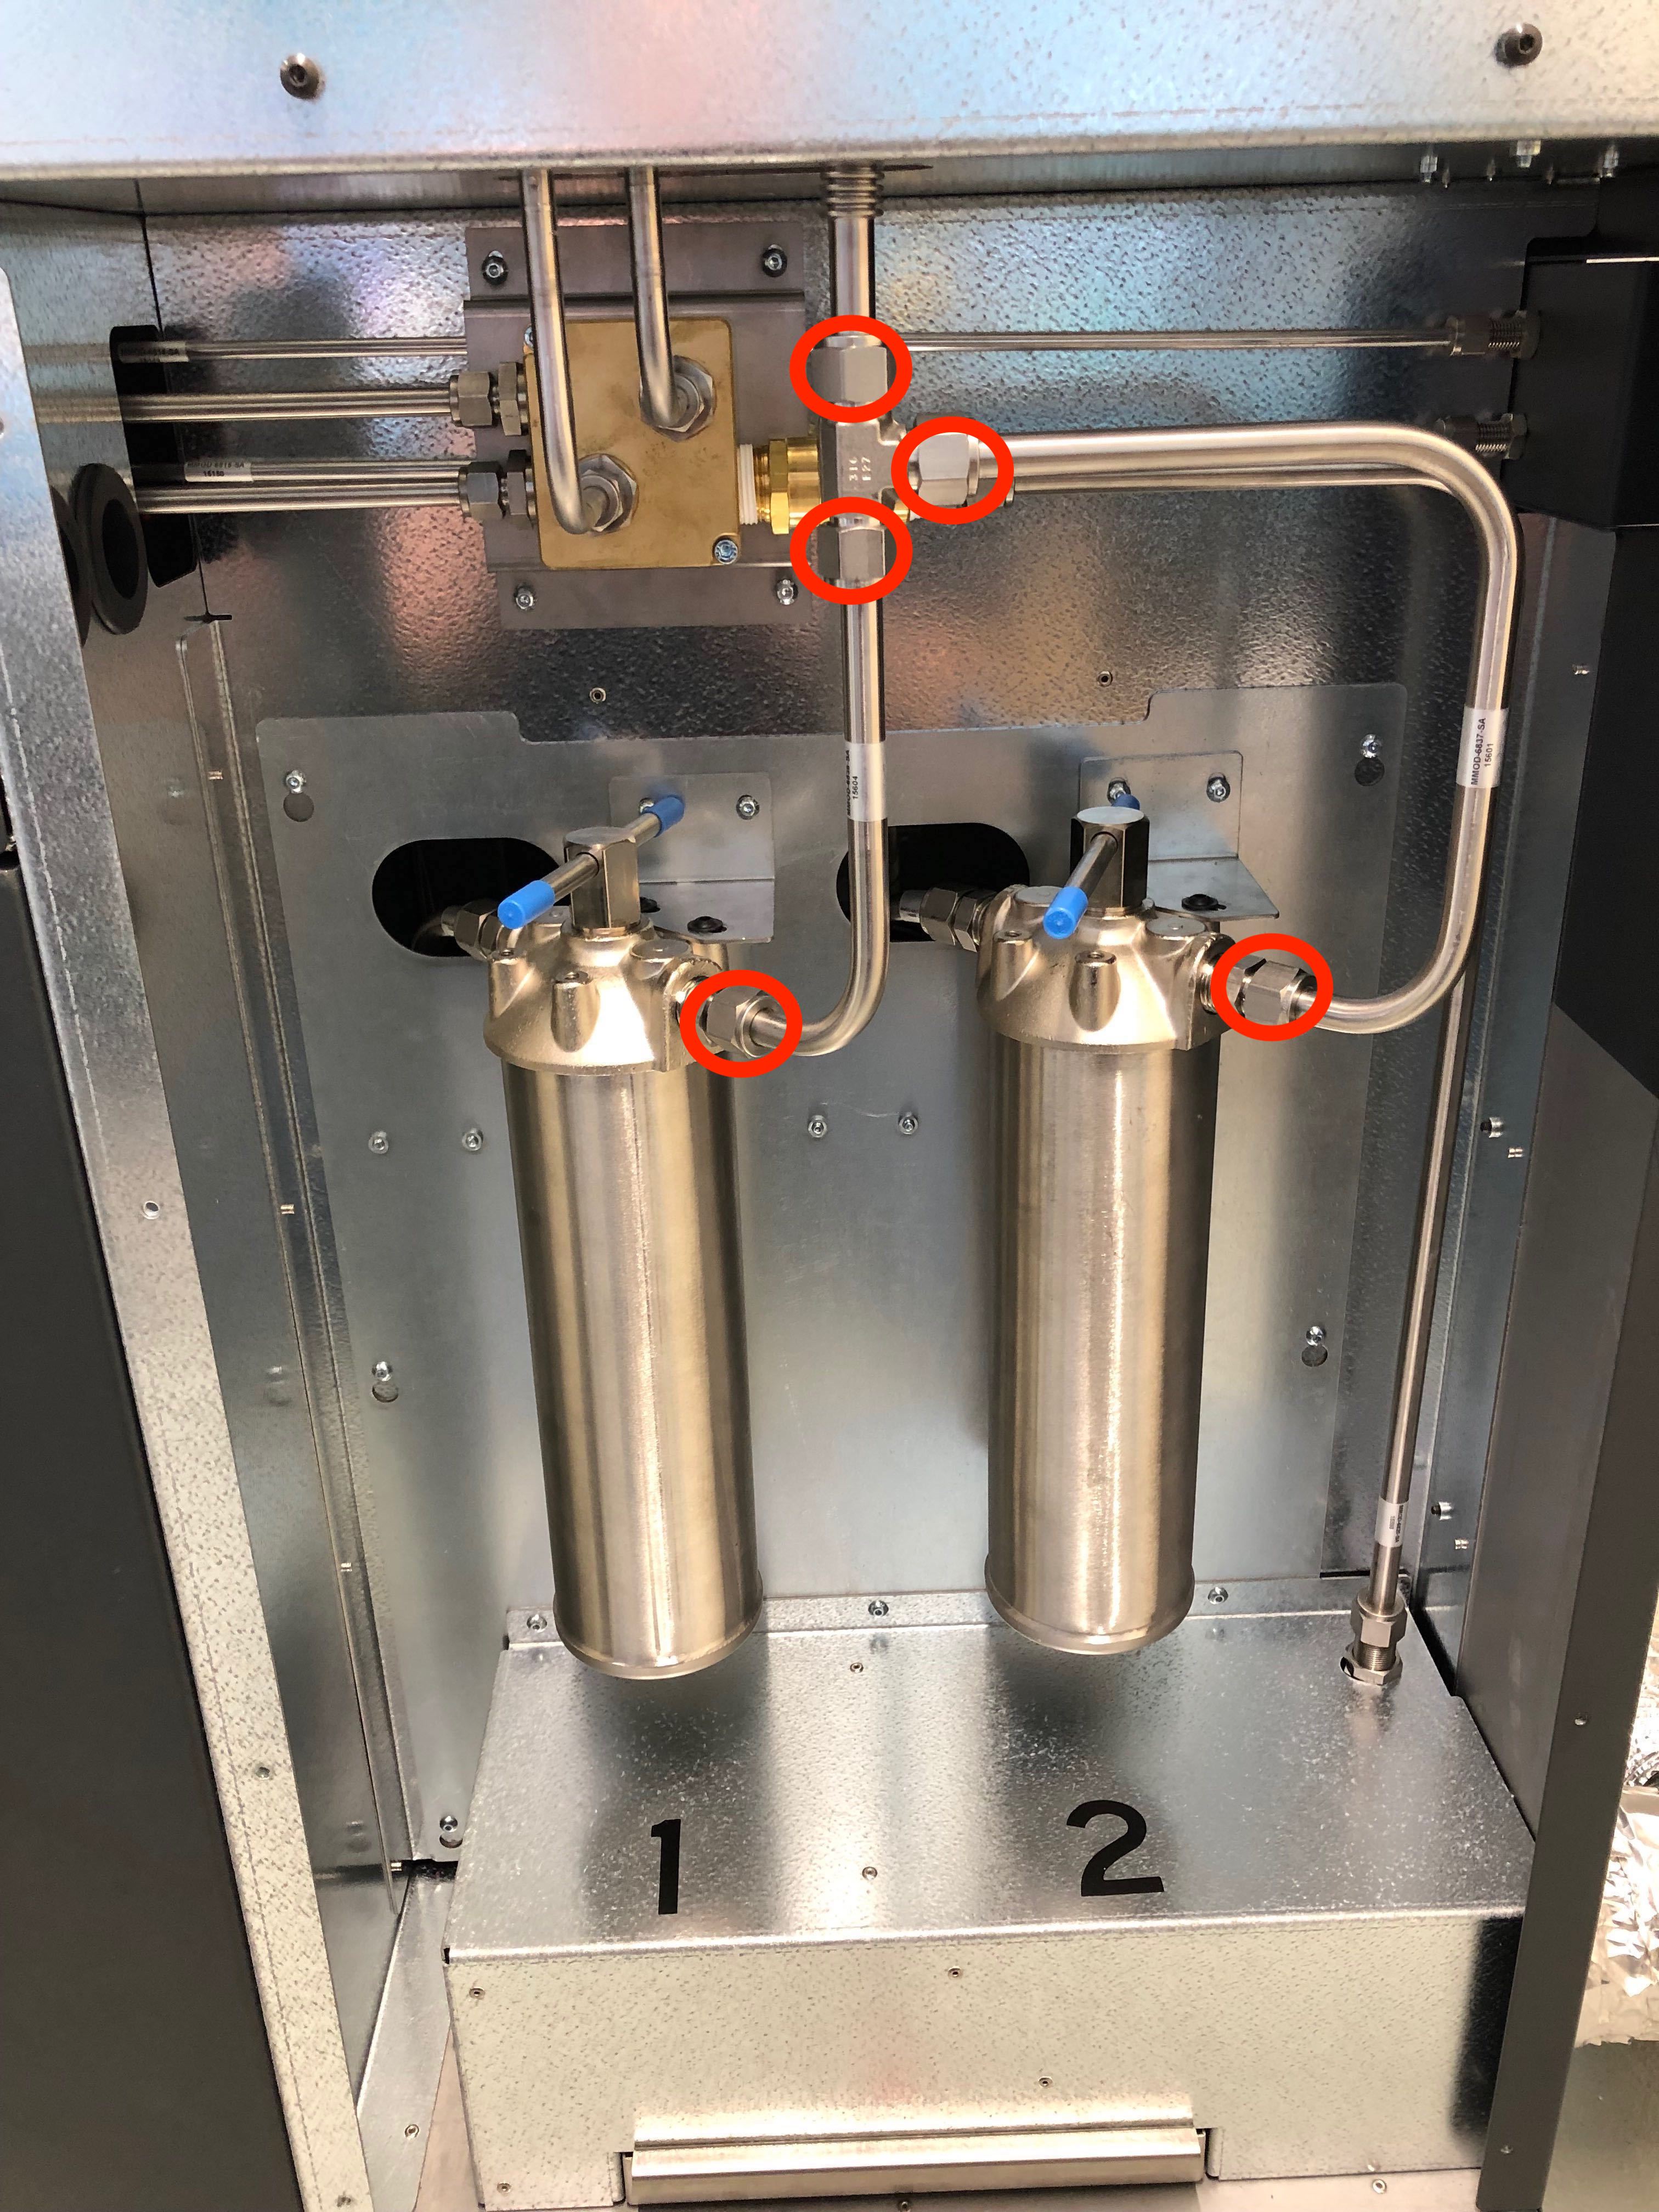
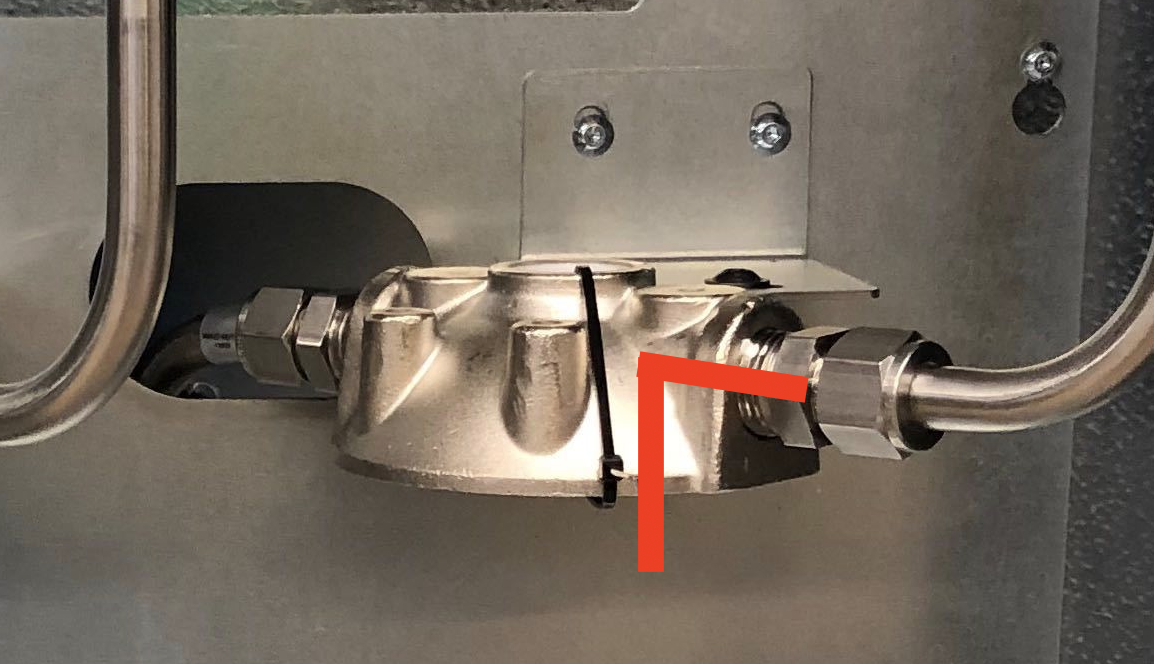
- Remove the exhaust flex line from the end cap. Additionally, remove the tubes and fittings connecting the retort to the exhaust filters by loosening the fitting using a 7/8" wrench as shown in the image below. Please refer to these instructions for proper handling of Swagelok fittings.
- Once removed, check the flex line and pipes for wax buildup. Additionally, check the exhaust filter mounting block for wax buildup inside the sealing area. Any buildup on these components can be removed from the inner cavity surfaces with a supplied pipe cleaner.
- Check the white Teflon gasket for deformation and debris. If the gasket is deformed, replace it and clean if necessary. Even a small amount of debris on the gasket can cause a leak.
A Good Gasket (Left) vs. a Bad Gasket (right)
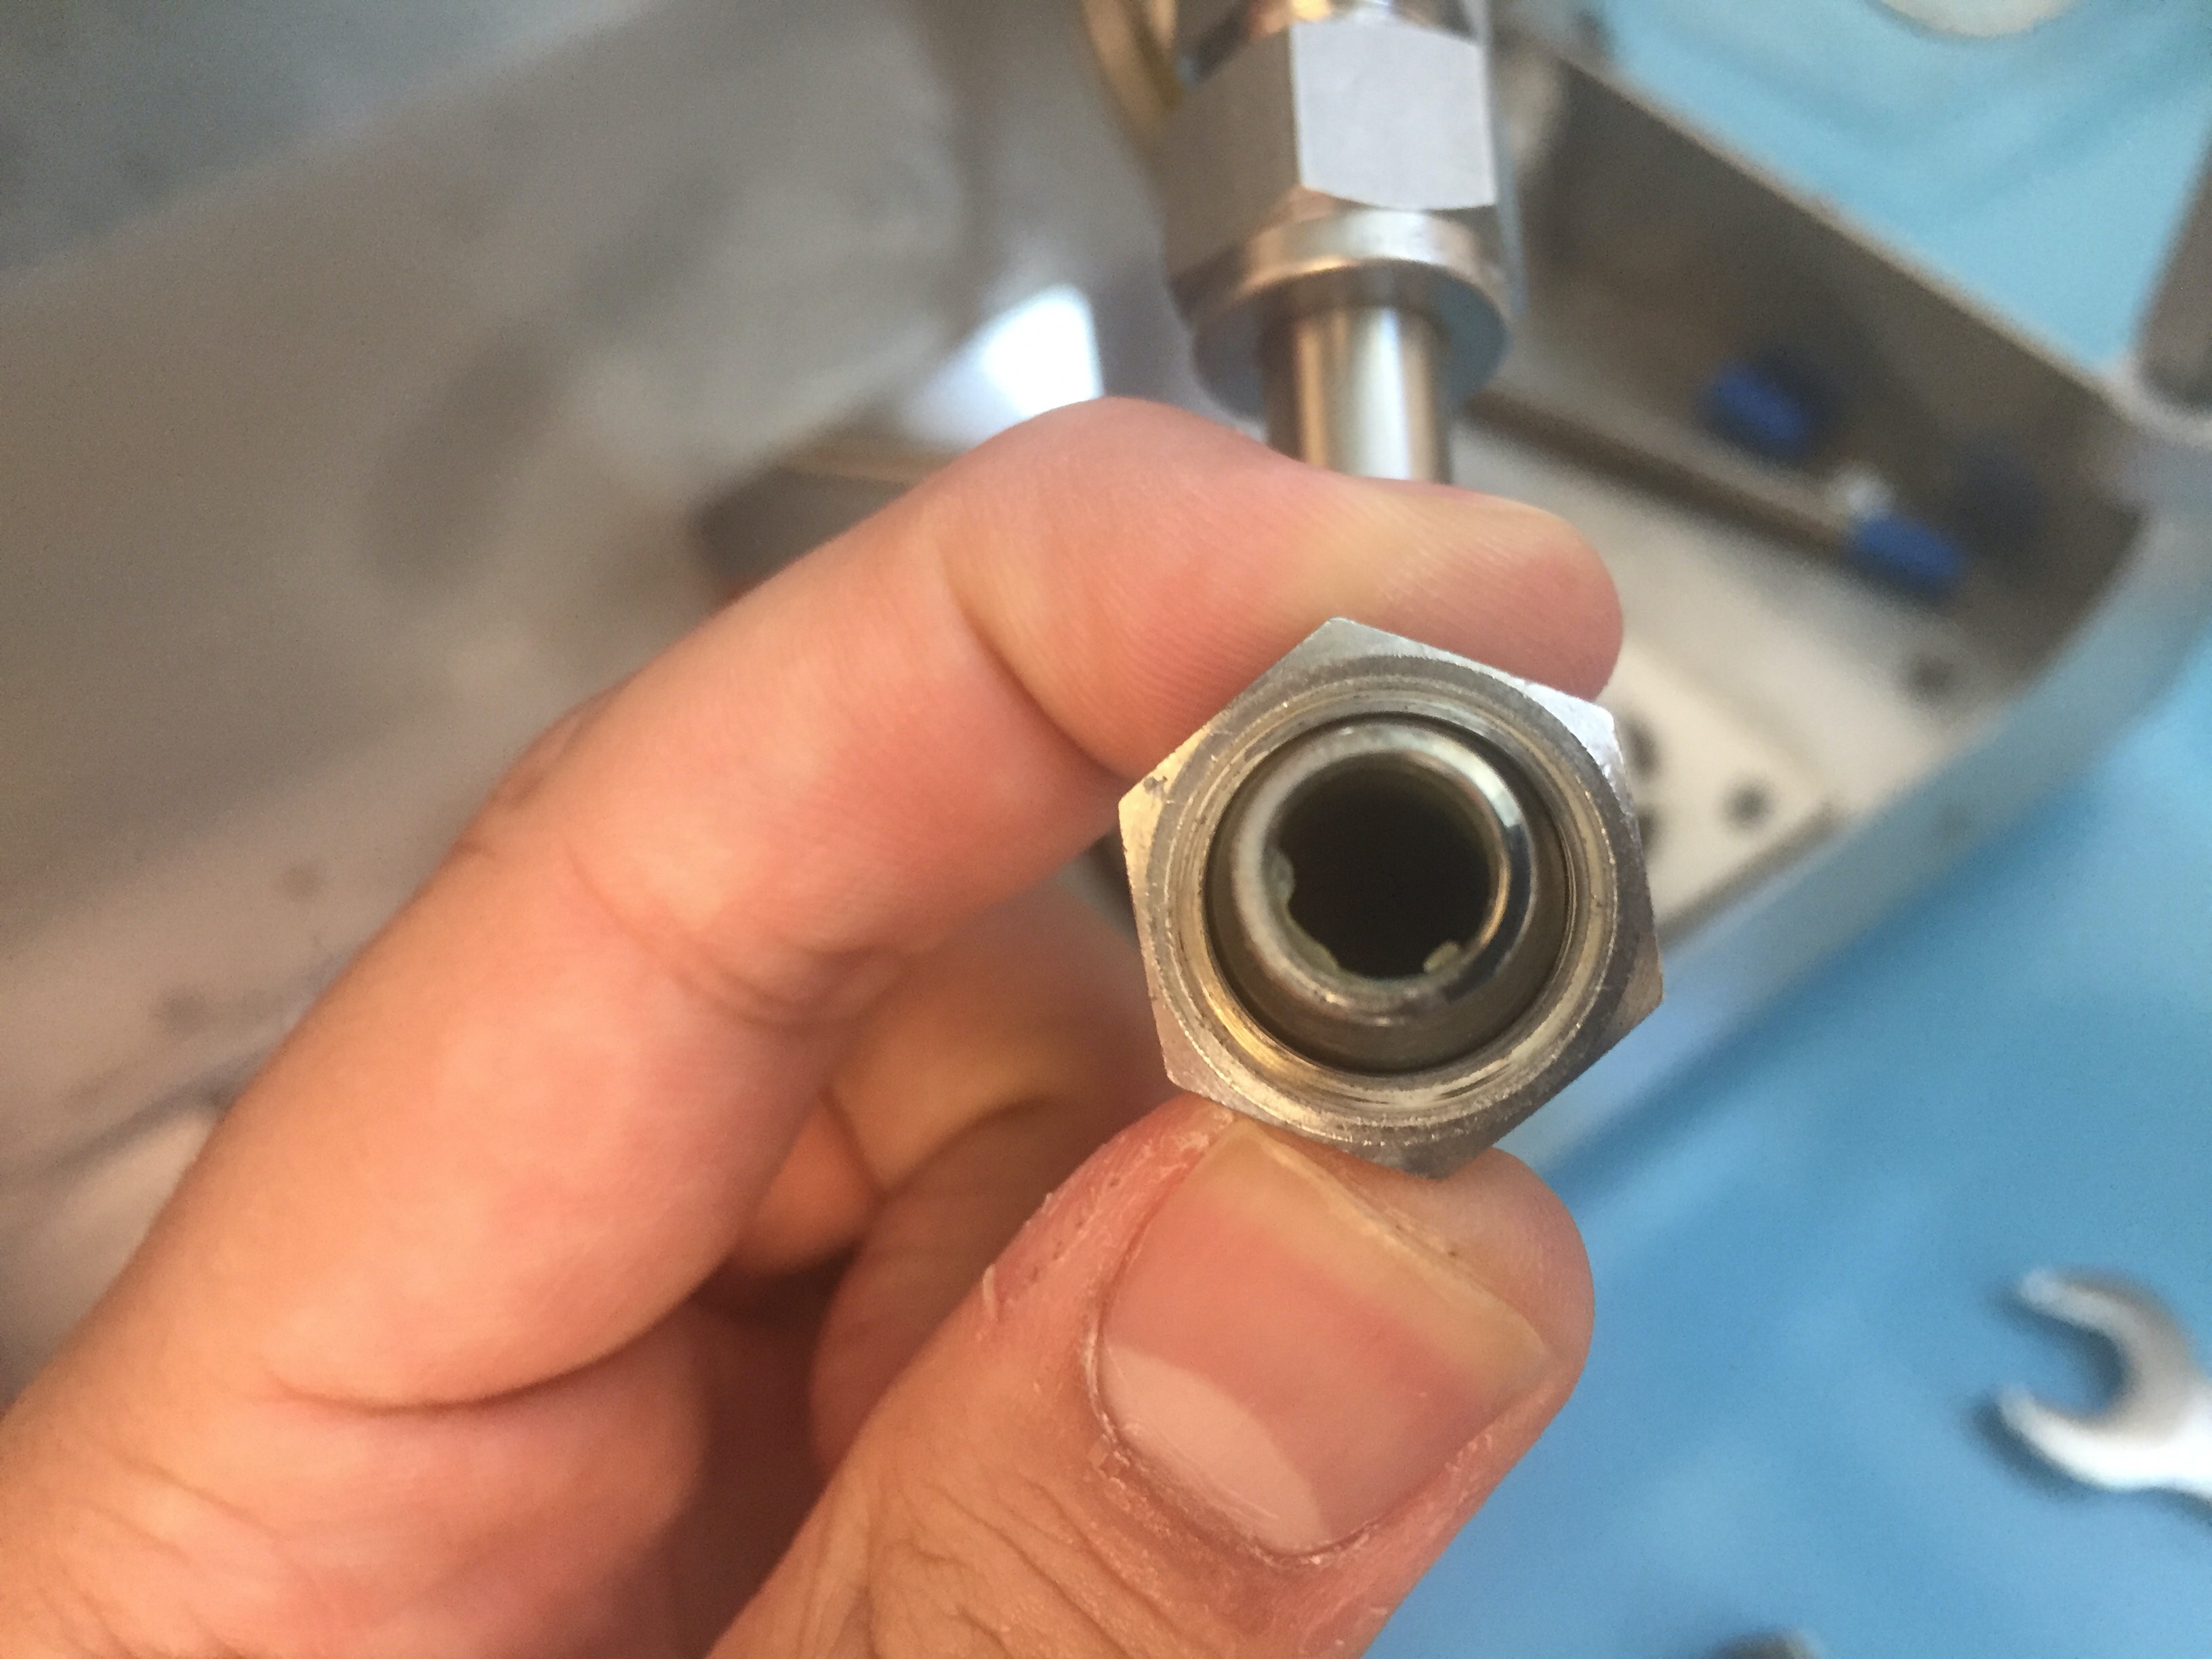
- Check the inlet of the exhaust filter mounting block. This is the most common locations of wax buildups that causes clogs. If necessary, use a supplied pipe cleaner to clear this channel of buildup. You can determine whether this channel is unclogged by shining a light through the top of the filter fitting.
-
Reattach the exhaust tubing assembly to the exhaust end cap -- referring to the Swagelok fitting reinstallation instructions -- then install the replacement exhaust filter and canister.
- Improperly tightened Swagelok fittings are a common cause of gas leaks.
- If significant wax is found on the filters or in the exhaust filter canisters, disconnect the moisture sensor cable and remove the moisture sensor from the block using a 30mm deep socket to ensure no debris made it downstream.
- Power on the furnace and restore mix and inert gas flow.
- Run a Static Pressure Check to ensure that the furnace is operating properly and can successfully pressurize and depressurize.
- If there is still a clog present, clean the system again.
- If there is a leak detected with the Static Pressure Check, please use this article to troubleshoot the leak.
For further technical support, please contact Hawk Ridge Systems at 877.266.4469 for the U.S. or 866.587.6803 for Canada and support@hawkridgesys.com.
Comments
Article is closed for comments.