
Problem
By default, changing the render mode within Composer will set all actors to appear as whatever mode is selected. This article walks through the steps needed to change the render mode of single or multiple actors, rather than setting that mode for the entire file.
Solution
As a first step, you will want to set the render mode to "Custom". To accomplish this, navigate to the "Render" tab if it is not already selected. This grants access to the "Mode" drop-down menu. Click on "Mode" and set it to "Custom". An example of this is shown below.
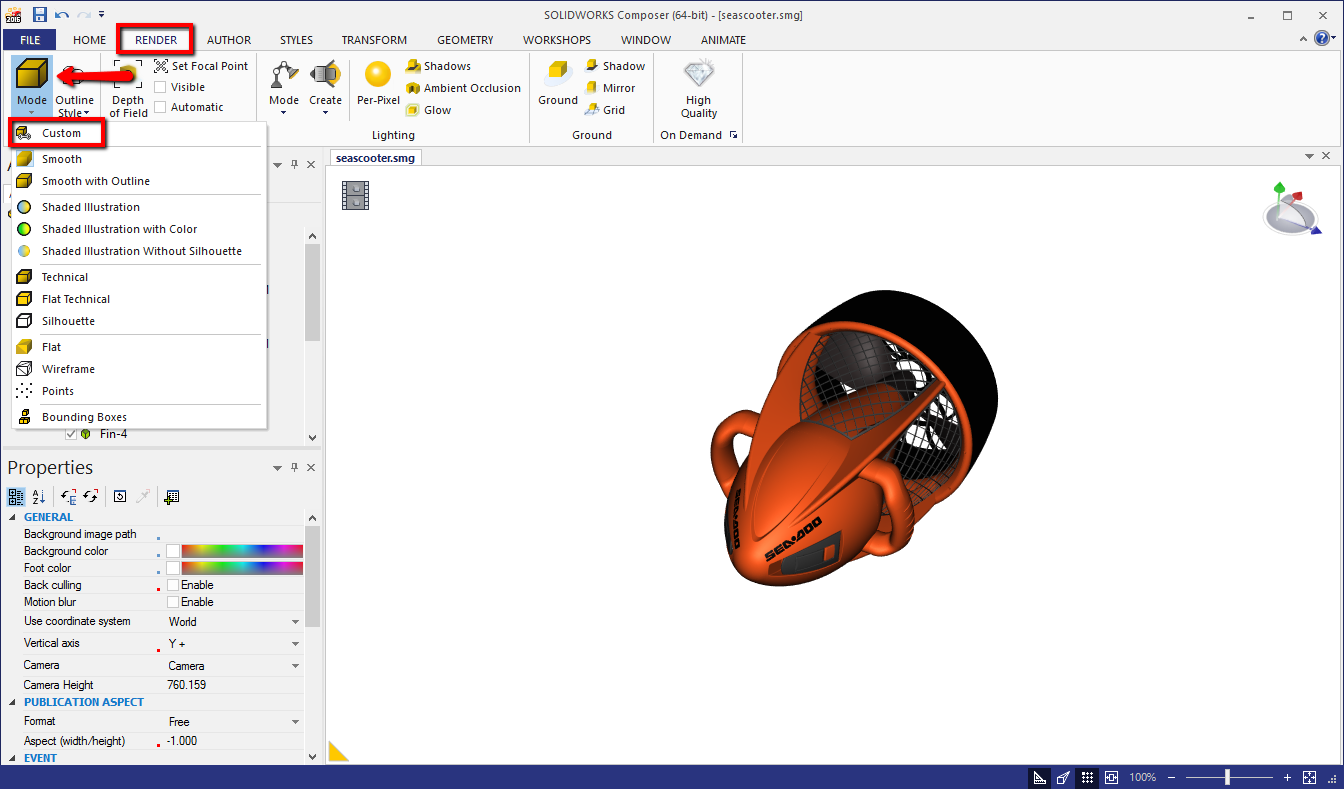
Setting the render mode to "Custom" allows the control for rendering to be set on the actor level. After this mode has been set, select the actors that you would like to change to a different render mode.
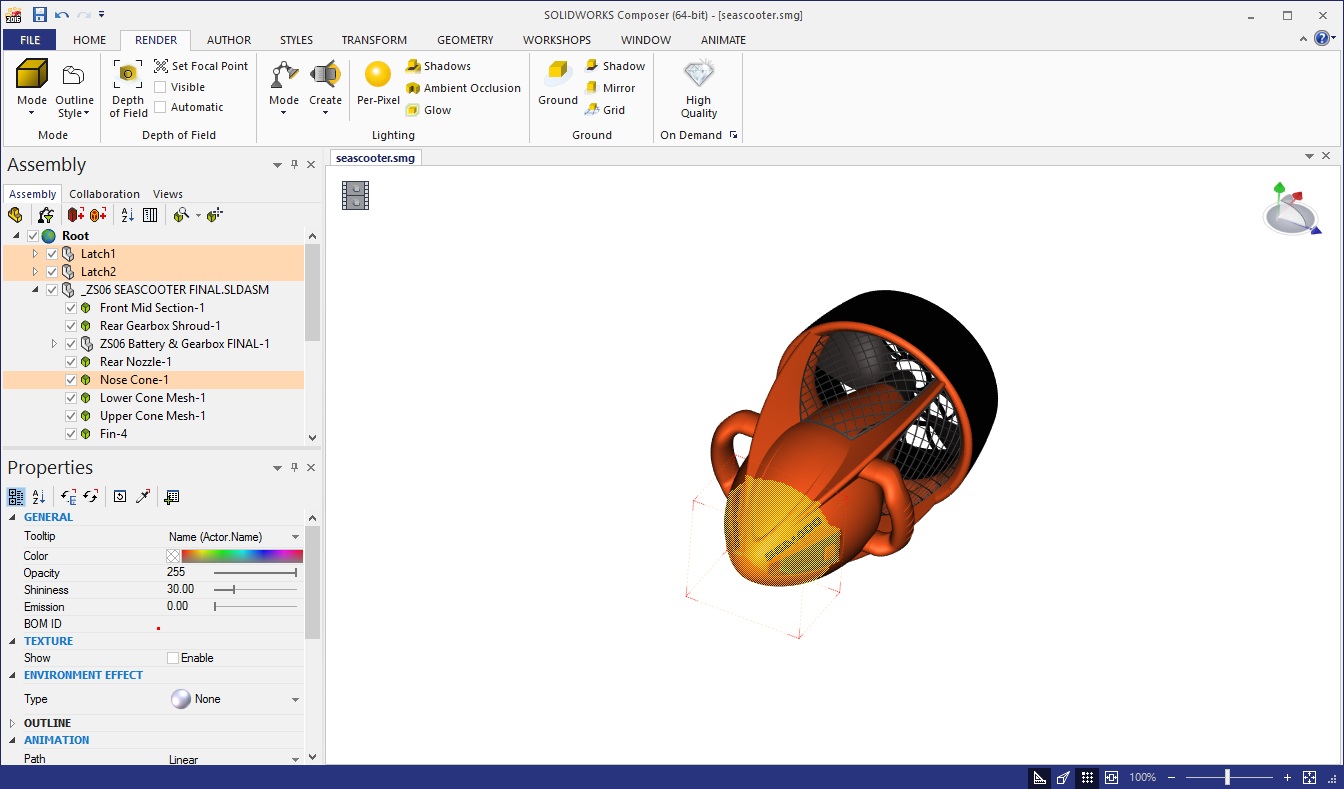
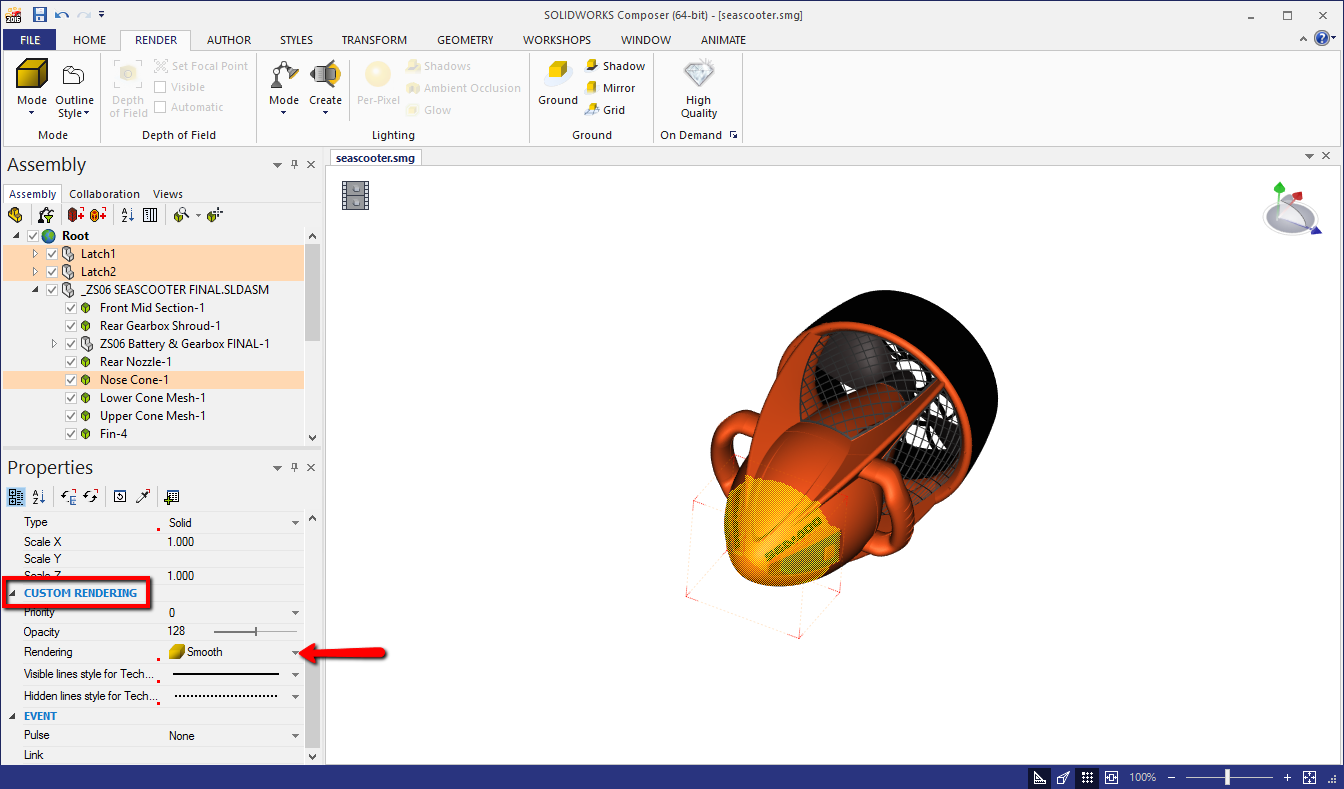
Once the render style has been changed to "Custom" and an actor has been selected, the "Custom Rendering" section is unlocked in the Properties pane. Here, you can make several different changes to the render style of the selected actor. To change the render mode for that actor, utilize the "Rendering" drop-down menu, located under the "Custom Rendering" section.
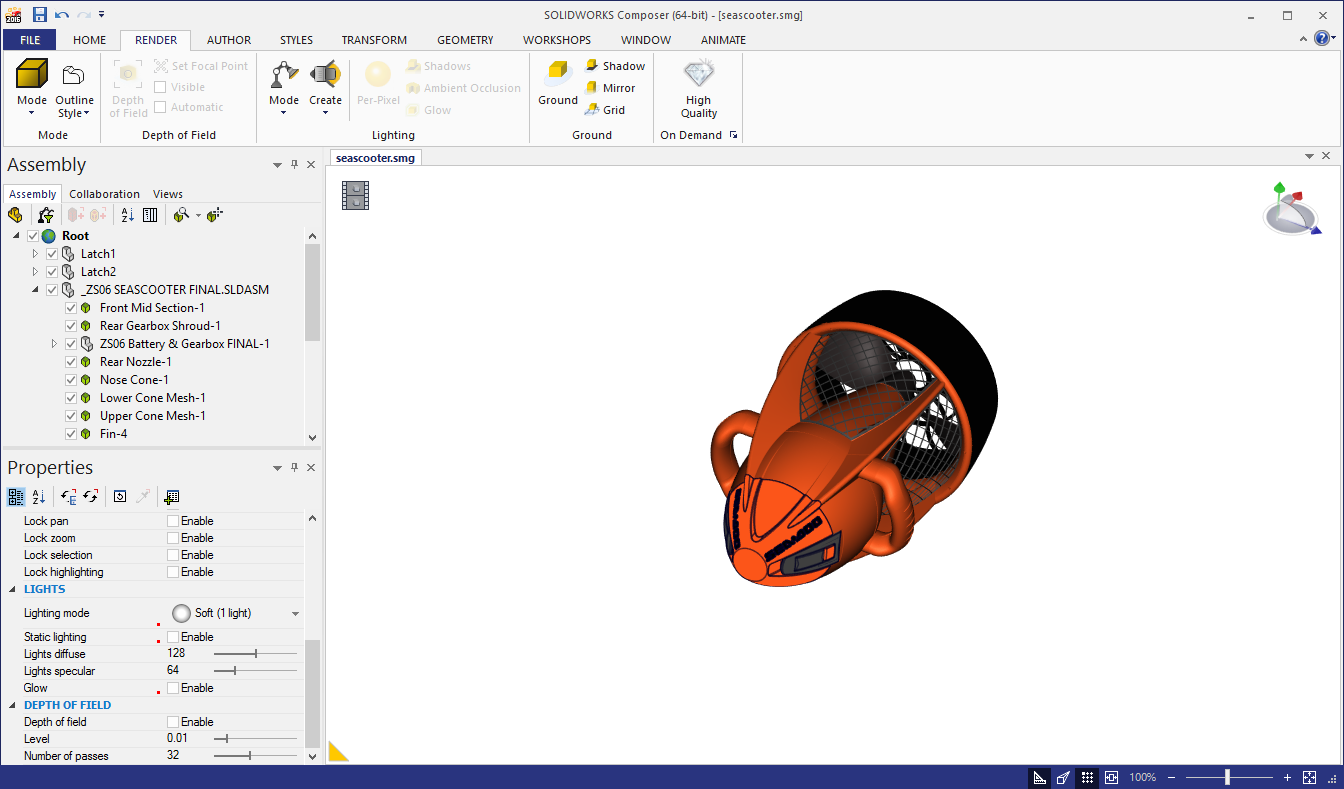
Once the render mode has been set in this way, you should see a change for only the actors that were previously selected. In the example illustration below, several actors at the front of the model were set to the "Flat technical" mode.
For further technical support, please contact Hawk Ridge Systems at 877.266.4469 for the U.S. or 866.587.6803 for Canada and support@hawkridgesys.com.
Comments
Article is closed for comments.