Problem
This article walks through an example of creating an animation where an actor rotates and translates to a different location at the same time.
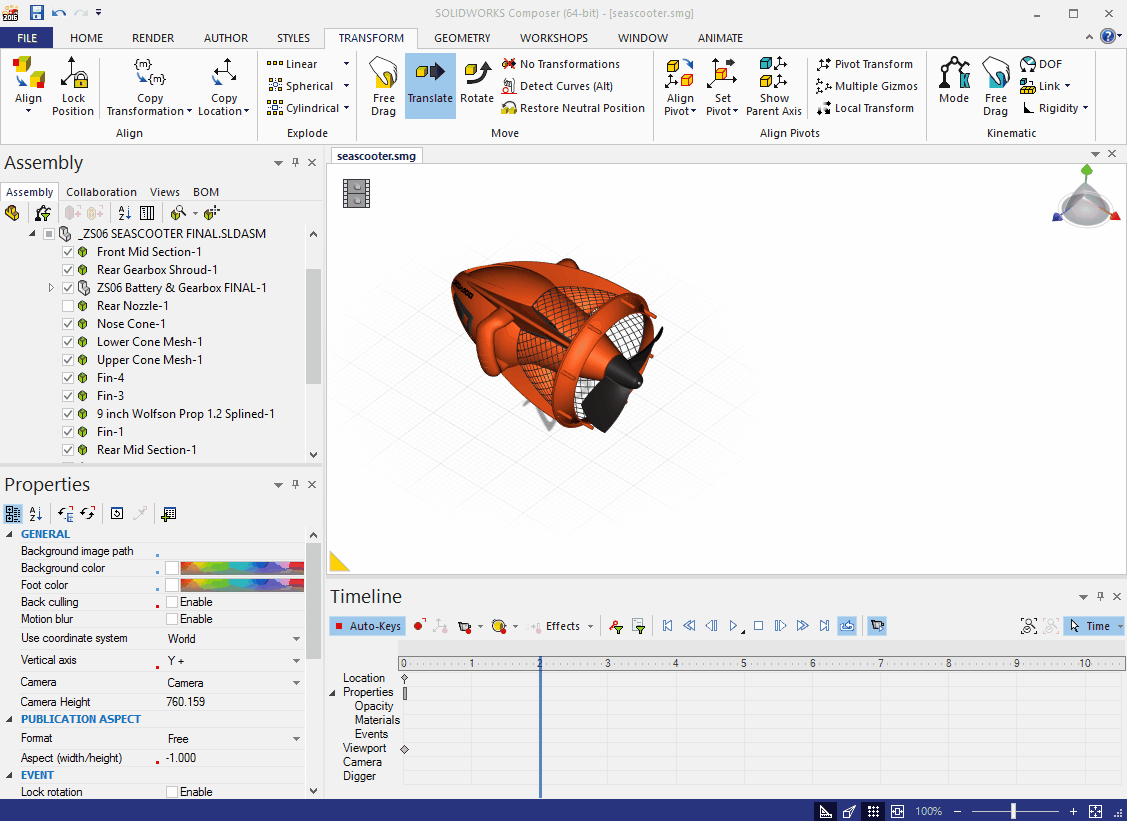
In order to translate and rotate an actor at the same time in Composer, the desired result will first need to be considered. If the actor is going to be rotating less than 180 degrees, then the two actions can be set on the timeline using the normal Translate and Rotate tools, as shown in this example animation:
However, using this method when an actor needs to rotate greater than 180 degrees while translating can cause the keys to interfere with each other, producing inconsistent results. To accomplish this sort of simultaneous rotation and translation in Composer, it is easiest to utilize Assembly Selection Mode to create a different combination of keys for the translation and rotation actions.
Solution
For the example scenario below, a propeller actor will rotate while translating for four seconds, starting at the two-second mark on the Timeline.
Example Scenario:
To start this simultaneous rotation and translate animation, we will first move our timeline position to the two-second mark, which is where the rotation will start in this example. As is the case with most actor animations, the start point of the action must be specified in the timeline. To do this, the "Set Keys" button can be selected after highlighting an actor to ensure that it will stay in that position until the action starts. The illustration below shows the setup of these first steps.

Once the start point of the rotation is set, move your timeline to where you want the rotation to end. In this case, the endpoint will be the six-second position.
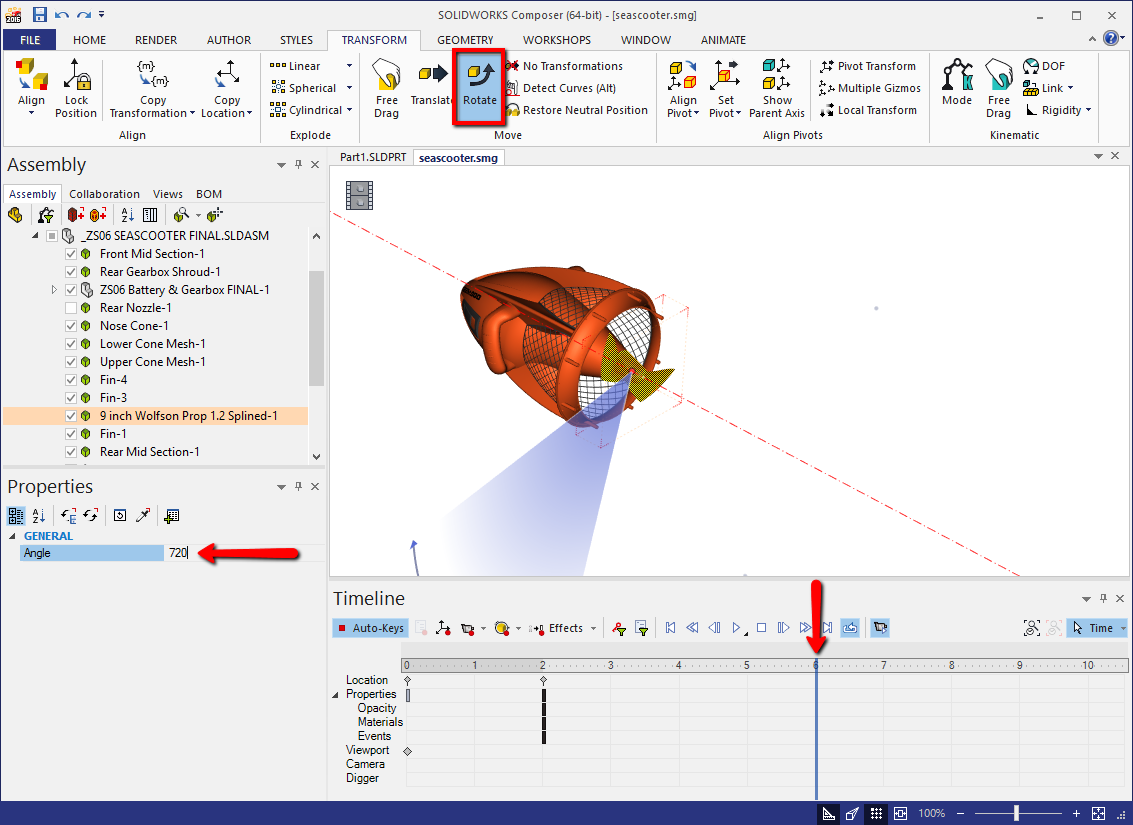
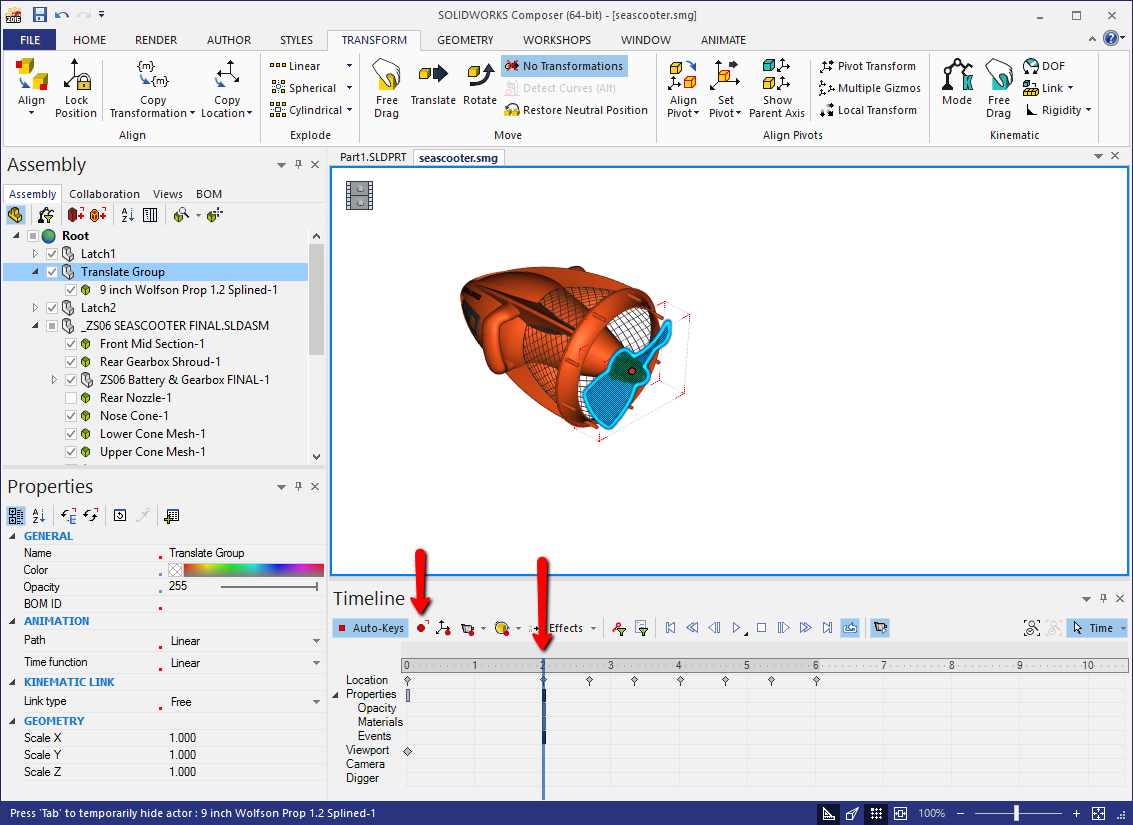
After positioning the timeline, select the "Rotate" tool and use the Pivot to select which axis you would like to rotate your actor on. As a note, once you select the axis to rotate an actor, you can rotate greater than 180 degrees by setting the exact angle of rotation using the "Properties" area, as shown below. However, Auto-Keys is required to be enabled for this particular function to behave correctly.
For this scenario, we will have the actor rotate 720 degrees from the two-second mark to the six-second mark. Because we manually set a position key for the propeller actor in the prior steps, the actor will not start to rotate until the two-second mark.
After inputting the number of degrees for the rotation via the "Properties" area, pressing the "Enter" key will confirm the setting.
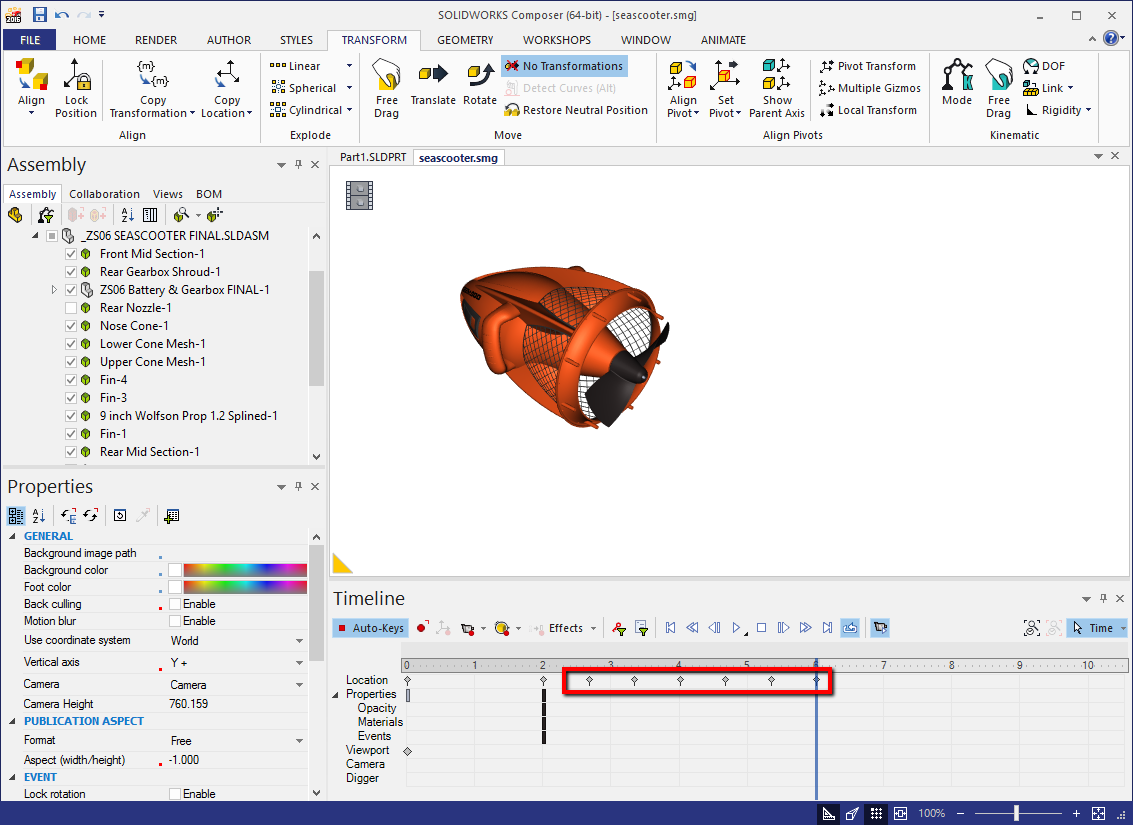
If the timeline keys were set correctly and Auto-Keys was enabled, you should see several keys appear that represent the rotation of the actor, which is shown in the picture below. The number and spacing of these keys will depend on the number of rotations that the actor performs during the specified time frame.
Now that the keys for the rotation of this actor are set, we can begin to set the keys for the translation action.
To set the translation keys, Assembly Selection Mode will need to be utilized. This will create a separate set of keys that does not interfere with the rotation keys that were previously set. However, since this actor is part of a subassembly, using Assembly Selection Mode on the actor will select the entire assembly that it is a part of.
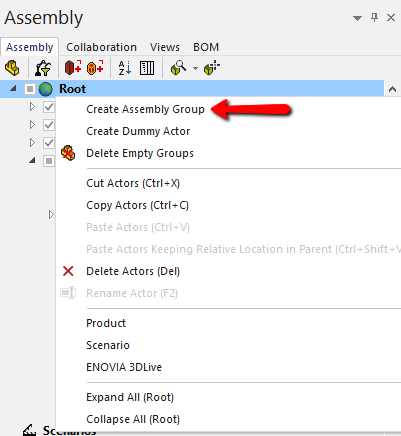
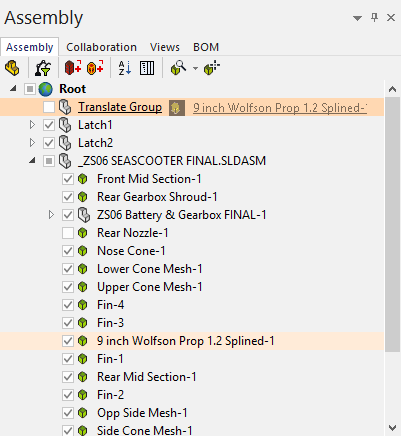
To circumvent this, we can create a separate assembly group for the actor that we want to translate. To create an assembly group, right-click on the top level of your assembly tree and select "Create Assembly Group", as pictured here:
The new assembly group that is created will not have a name by default. In this scenario, the assembly group that we place the propeller actor in will be named "Translate Group".
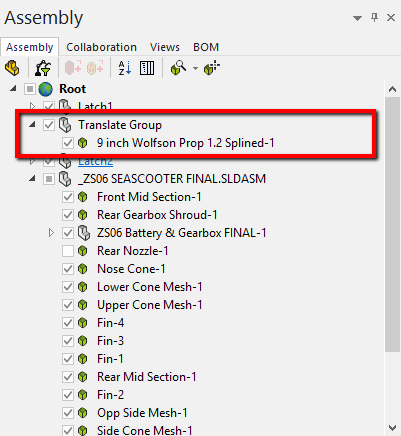
Once the assembly group is created, you can place the actors that you want into the group. As shown in the example below, the propeller actor is placed into the group by left-clicking and dragging it into the group.
After performing this action, the actor should appear below the new group in the assembly tree.
After placing the actor into the new assembly group, we can turn on Assembly Selection Mode and select only the propeller actor, either by clicking on it in the Viewport or by selecting the group itself in the assembly tree. Note that multiple actors can be placed into a custom assembly group, but Assembly Selection Mode will select all actors in that group. This can be useful if you have already rotated multiple actors and would like to translate them all at the same time.
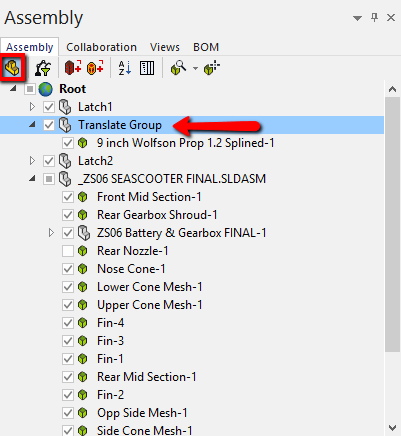
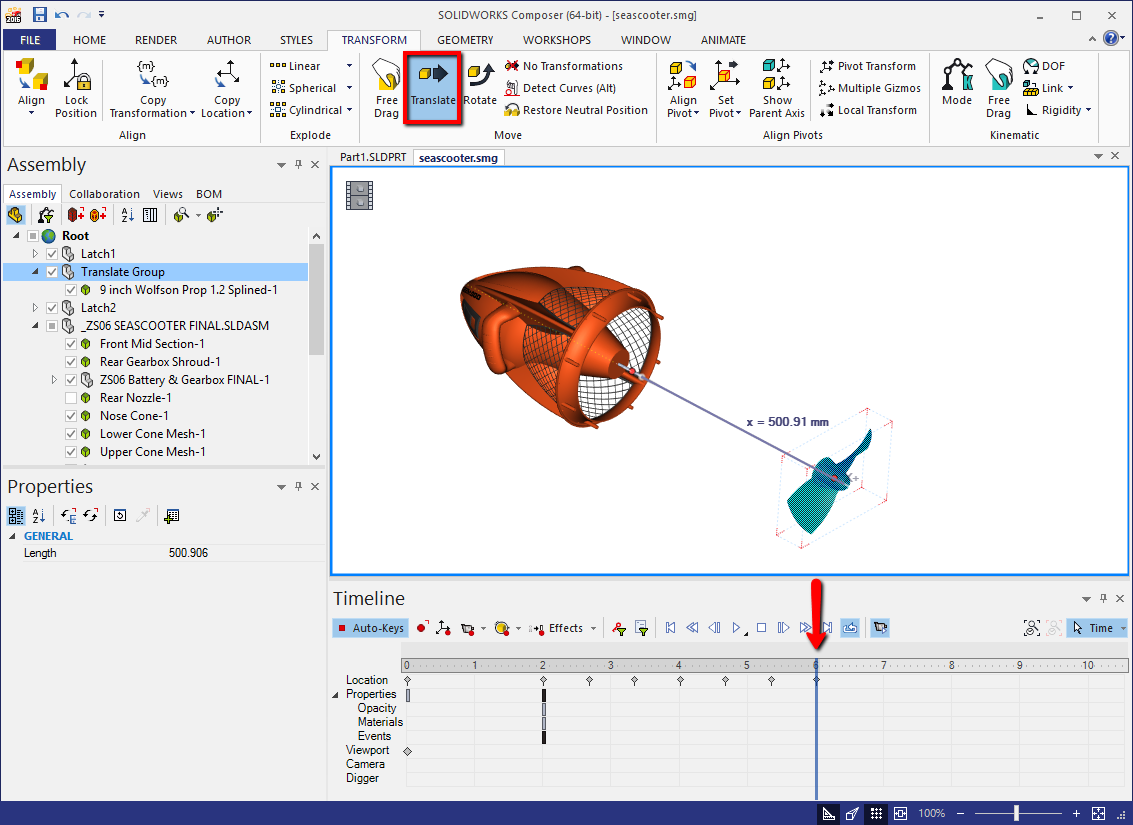
With Assembly Selection Mode turned on, the actor should be highlighted blue in the Viewport. Since keys placed when Assembly Selection Mode is enabled are separate from keys placed when it is not, we will also need to specify where the translation of this actor begins on the timeline.
Similar to what was done at the beginning of this article, we can do this by moving the timeline to the appropriate position and clicking "Set Keys". In this scenario, we are also setting the translation to begin at the two-second mark, although it is important to note that the translation and rotation do not have to begin and end at the exact same times.
A key has now been placed that will dictate where this actor will be until the rotation starts at two seconds. Now, we can move the position of the timeline to six seconds, where we want the translation to end.
Once the timeline has been moved, the "Translate" tool can be selected, and the actor can be moved along a specific axis. With Auto-Keys enabled, simply translating the actor with your mouse after clicking on an axis will set an end location key. However, as with the rotate tool, you can specify an exact translate distance under the "Properties" area and press the "Enter" key to confirm the number.
An illustration for these steps can be found below.
After performing these steps, the propeller actor in this example scenario now translates and rotates 720 degrees simultaneously from the two-second mark to the six-second mark.
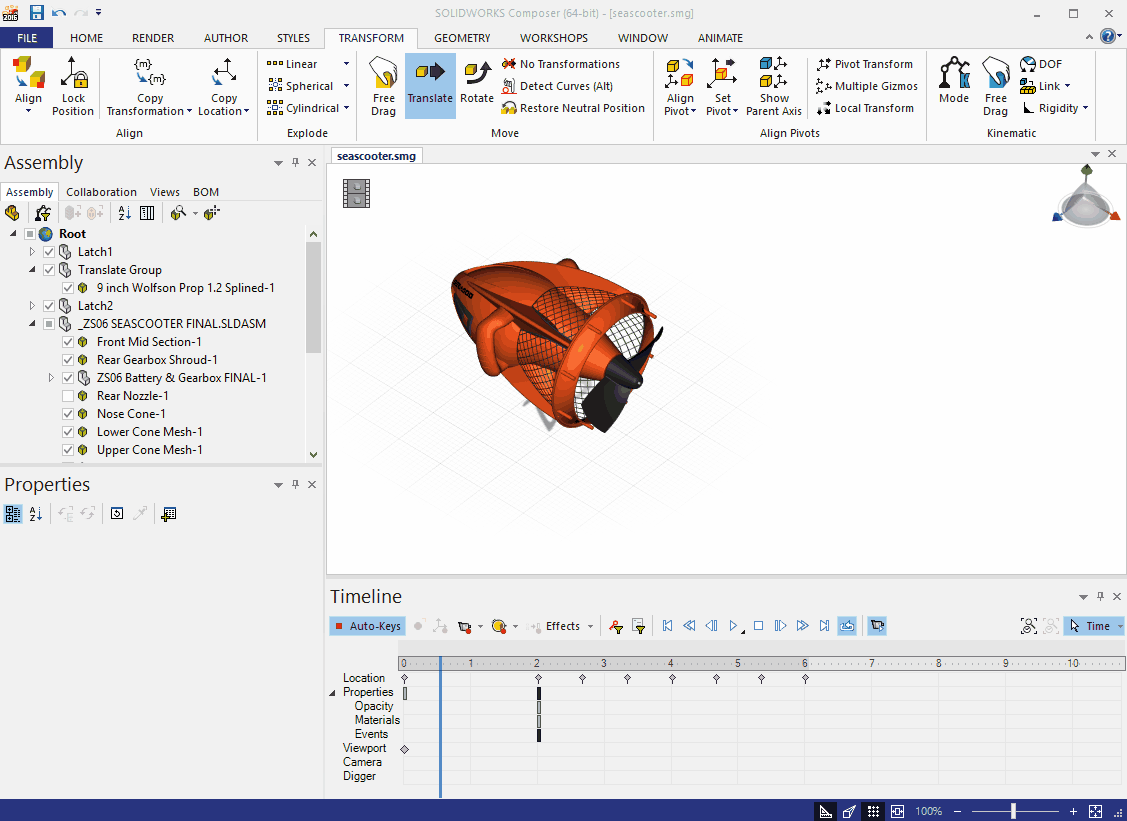
The workflow shown in this article should also produce valid results if you translate an actor first and use Assembly Selection Mode to produce the rotation keys.
For further technical support, please contact Hawk Ridge Systems at 877.266.4469 for the U.S. or 866.587.6803 for Canada and support@hawkridgesys.com.
Comments
Article is closed for comments.