
Problem
When logging into the PDM Vault View on a client machine, errors can sometimes occur: "Could not access the item in database" or "Could not find server". These error messages may provide the vault name and the PDM Server Name. Attempts to reboot the machine or use a different network connection method sometimes do not resolve the issue.
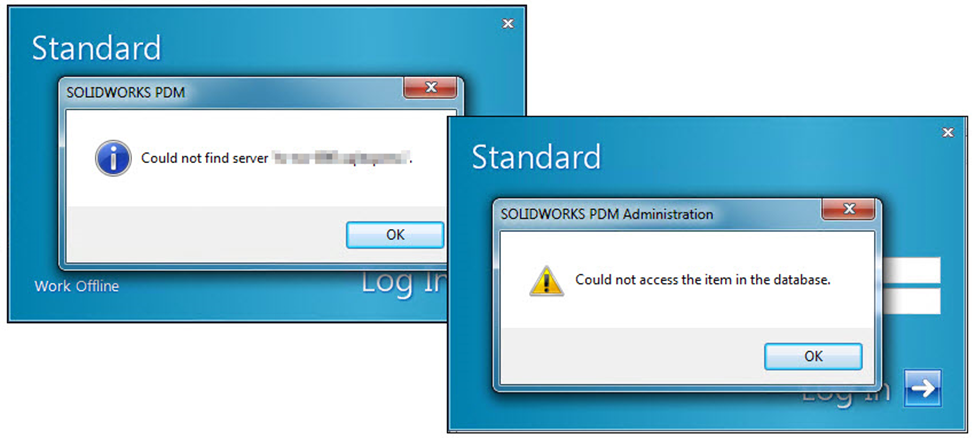
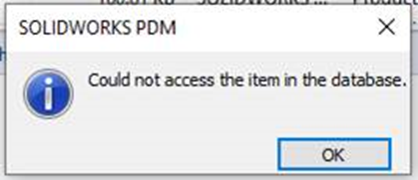
When viewing the PDM client log from the admin tool, there are repeated connection error entries. This generally indicates that the PDM Client machine is unable to communicate with the SQL Server properly. The logs will also provide the hostname of the PDM Server and Database it is connecting to.

Solution Step 1: Create an ODBC Connection
Creating an ODBC connection on the PDM Client machine will resolve this issue. Creating this connection is a manual handshake between the client machine and the database server. This has also been useful for clients who work remotely and, in some cases, helps with performance.
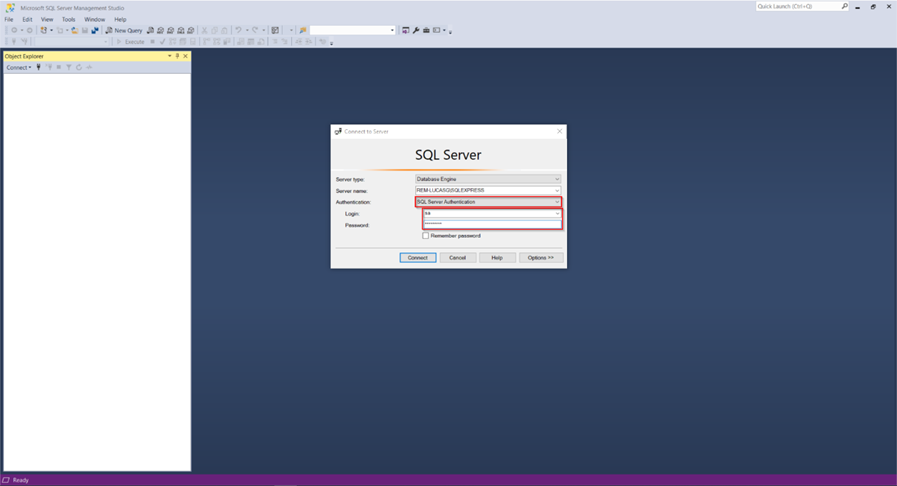
- We will need the "sa" password for the database. We can test if it is the correct password by logging into Microsoft SQL Server Management Studio (SSMS).
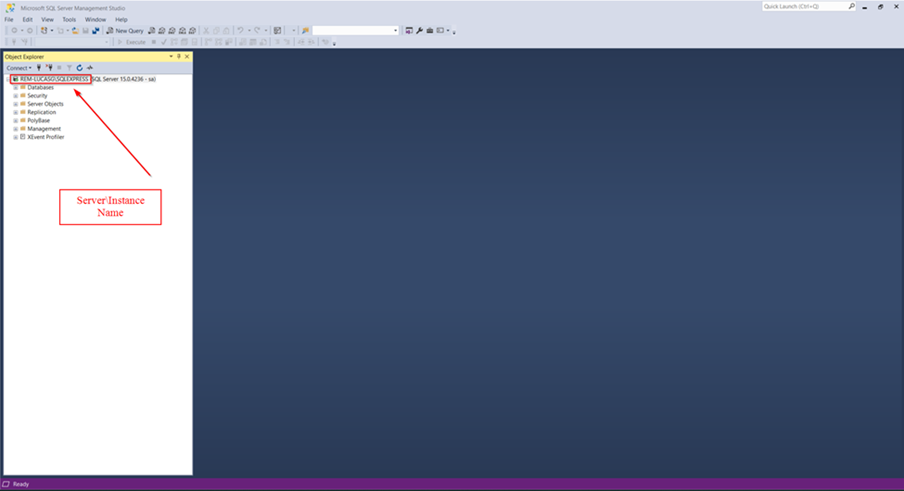
- The "Server" or "Instance" Name can be found in Microsoft SQL Server Management Studio (SSMS)
- When using SQL Express (PDM Standard), we will need to know which ports SQL Express has dynamically used. We can find these in the SQL Server Configuration Manager. If these ports are not changed to 1433 or 1434, we will need to open these ports in the server’s firewall.
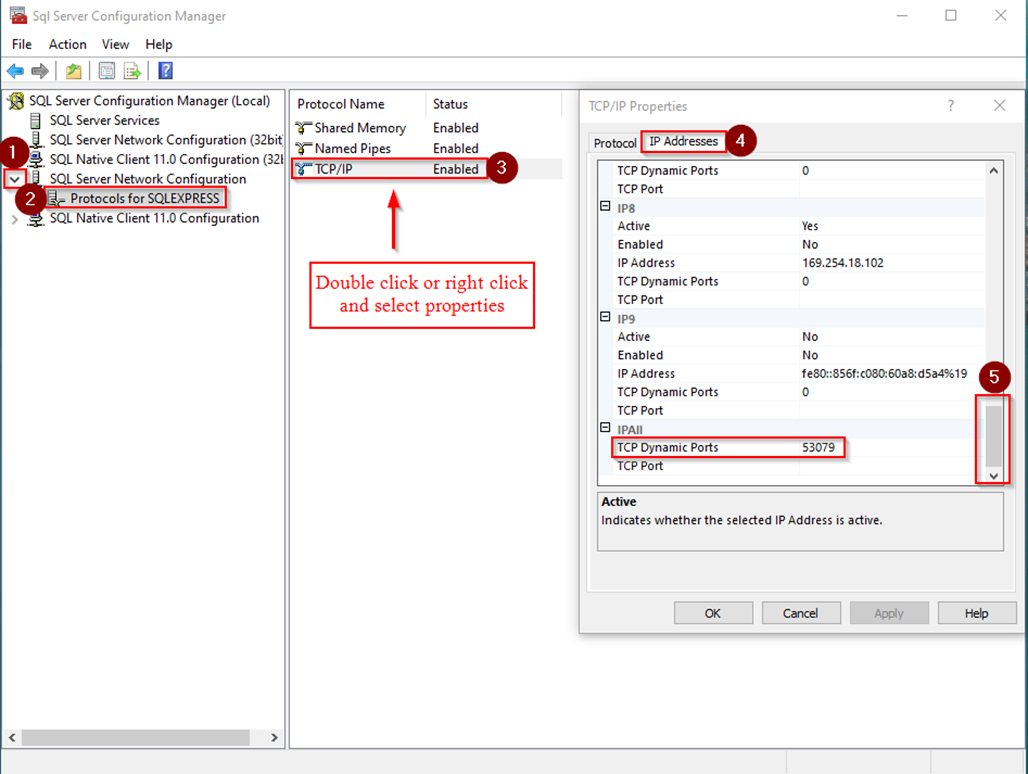
Solution Step 2: Setting up the ODBC Connection on the Client
Go to the client machine experiencing the issue and open ODBC Data Sources (64-bit). Navigate to the Windows Control Panel > System and Security > Windows Tools (on Windows 11 machines).
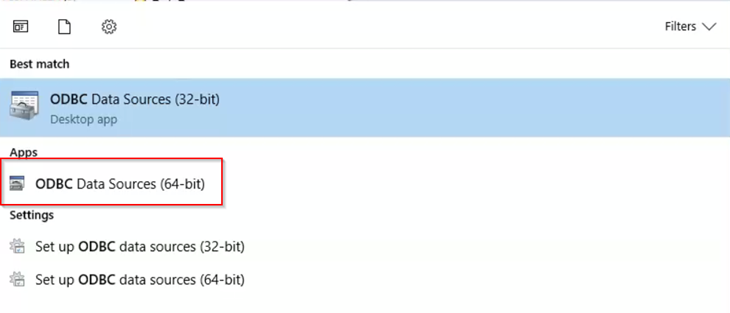
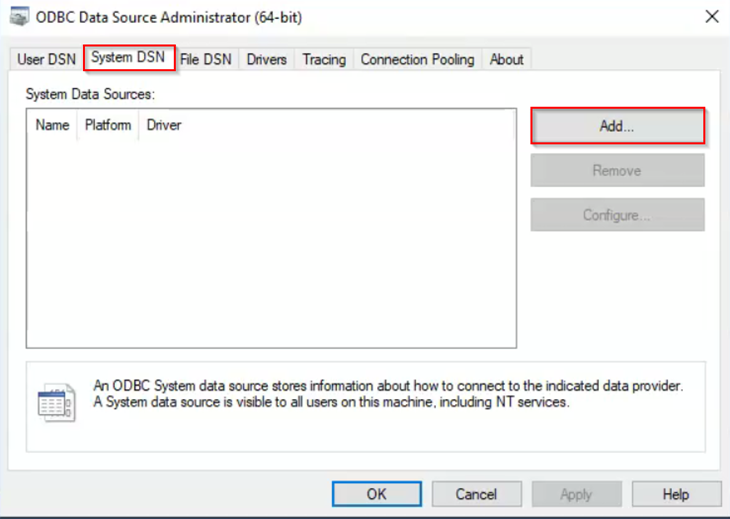
After opening ODBC 64-bit, navigate to the System DSN tab and add a source
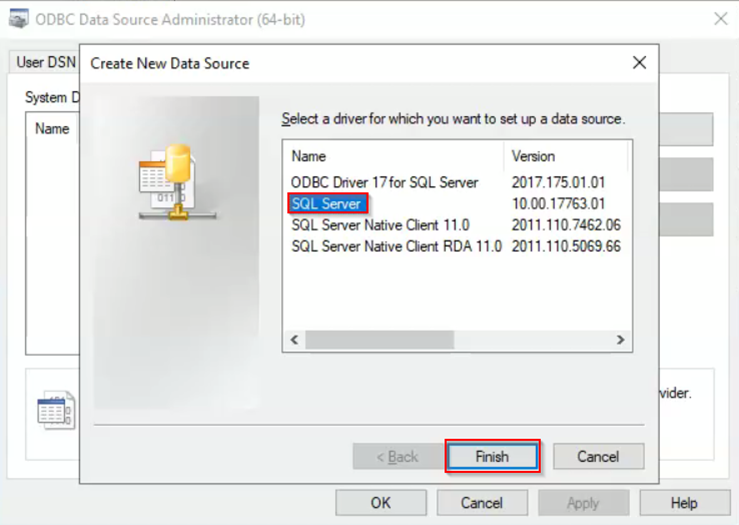
Select "SQL Server" for the data source and click the "Finish" button
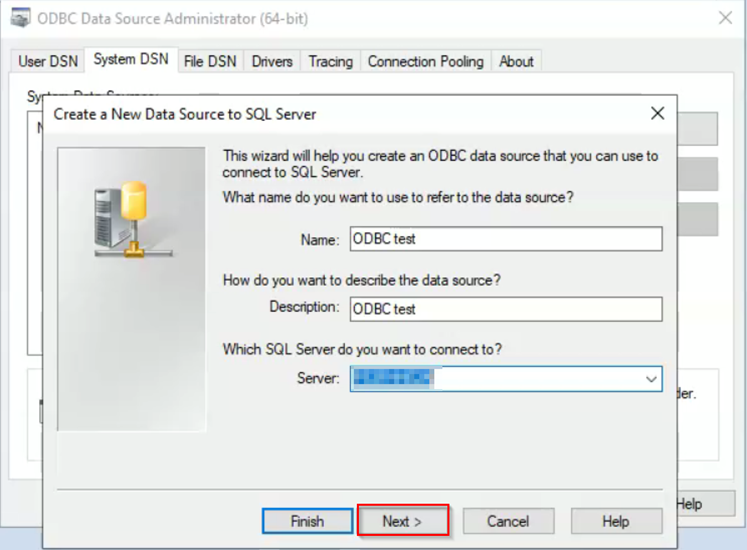
Enter a name and description for the data source being created. Select or enter the name of the server hosting the database. This is the information found in Step 2 of the Solution Step 1 section above when logging into the Microsoft SSMS tool.
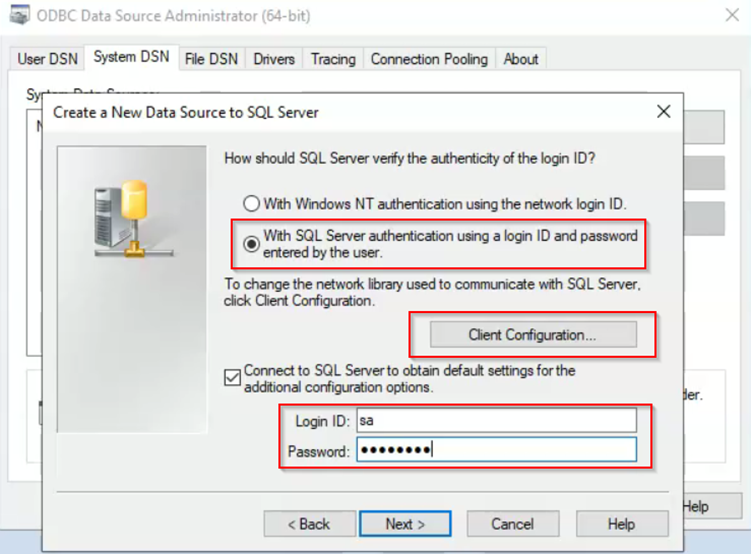
Select the SQL Server authentication radio button. Provide the SQL Server login credentials by typing in "sa" for the Login ID and the corresponding password. Before clicking the "Next" button, do not forget to click the "Client Configuration" button and verify whether a static or dynamic communication port is used for the SQL Server.
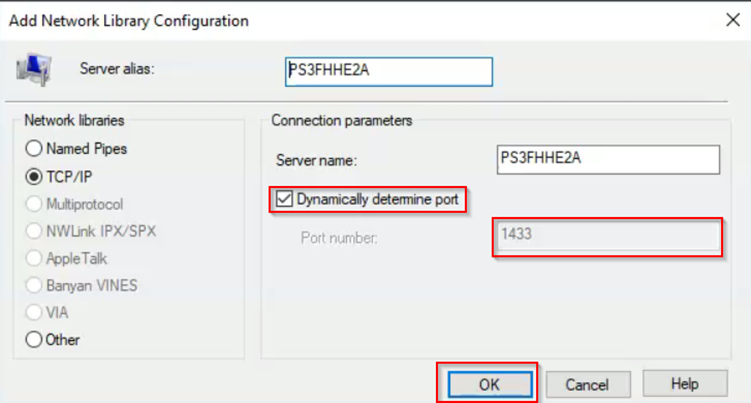
After selecting Client Configuration and before selecting Next, add the dynamic port from the SQL Server Configuration Manager. This information is found in Step 3 of the Solution Step 1 section above. In order to add a dynamic port, we will first need to uncheck the 'Dynamically determine port'. If we do not need to change this information, do not uncheck that option.
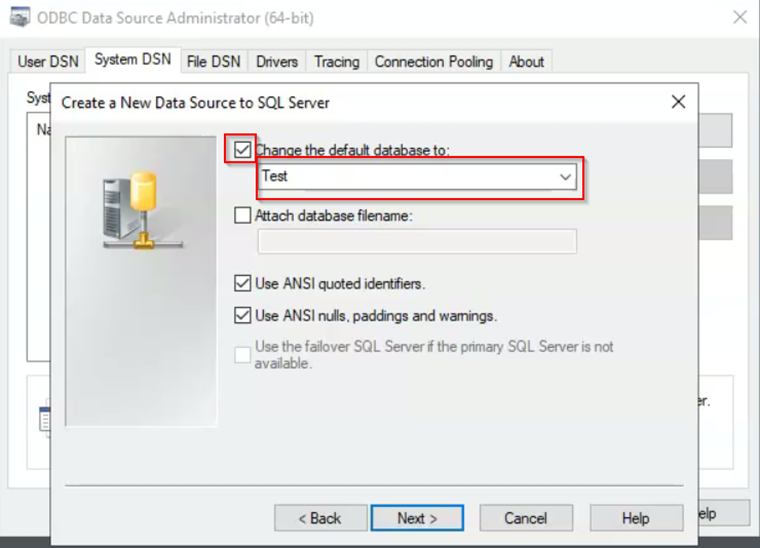
Select 'Change the default database to', select the vault name, and then click "Next"
On the next page, we do not have to change anything, so select "Finish"
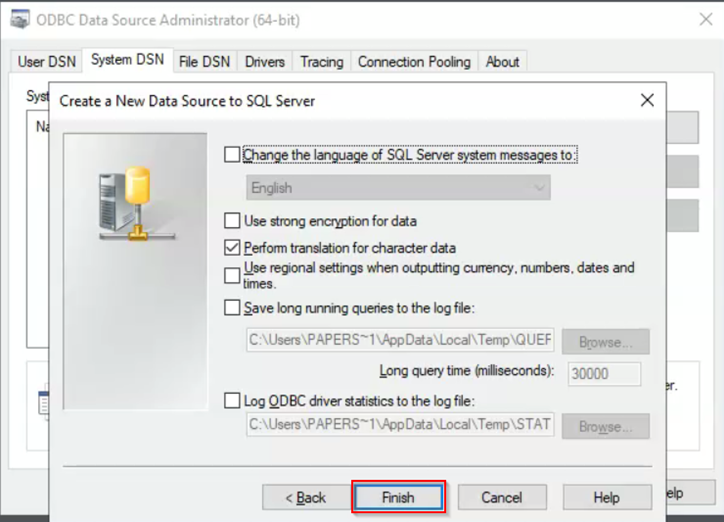
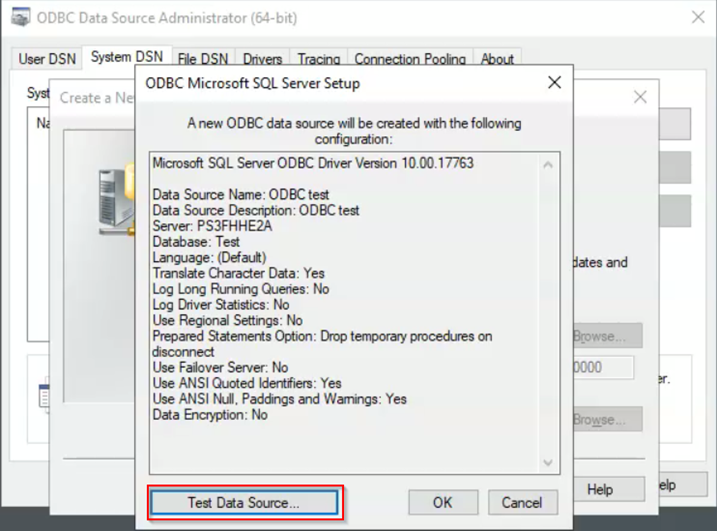
Select the "Test Data Source" button in the new window
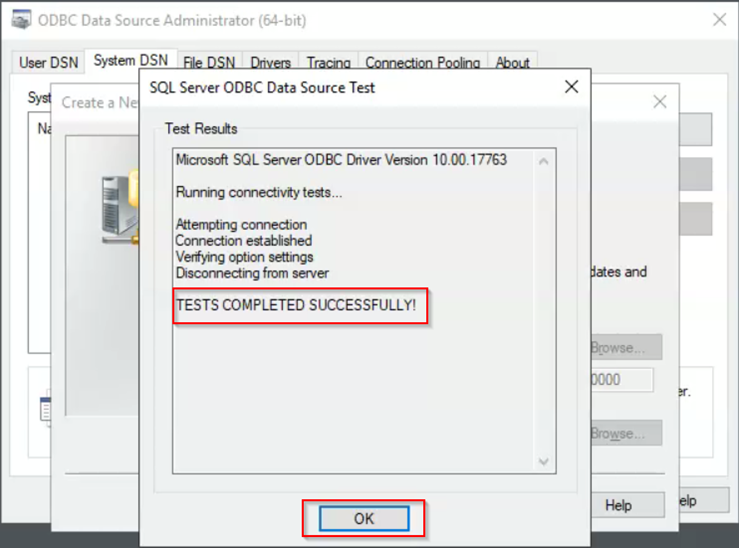
If everything was entered correctly, we should see the following "Tests Completed Successfully" screen. We can simply click on "OK" to finish the process of creating an ODBC Connection to the database.
Repeat the same procedure for setting up the 32-bit ODBC Data Connector for office applications
Log back into the PDM vault and check for errors
For additional support, existing customers can submit a ticket or new customers can contact Hawk Ridge Systems.
Comments
Article is closed for comments.