
Problem
One benefit of the SOLIDWORKS Toolbox is that when a component has a Toolbox flag, SOLIDWORKS inserts the matching file from the Toolbox. This works if the checkbox "Make this folder the default search location for Toolbox components" is enabled in Tools > Options > Hole Wizard/Toolbox. This feature helps reduce file size for users sharing the same Toolbox.
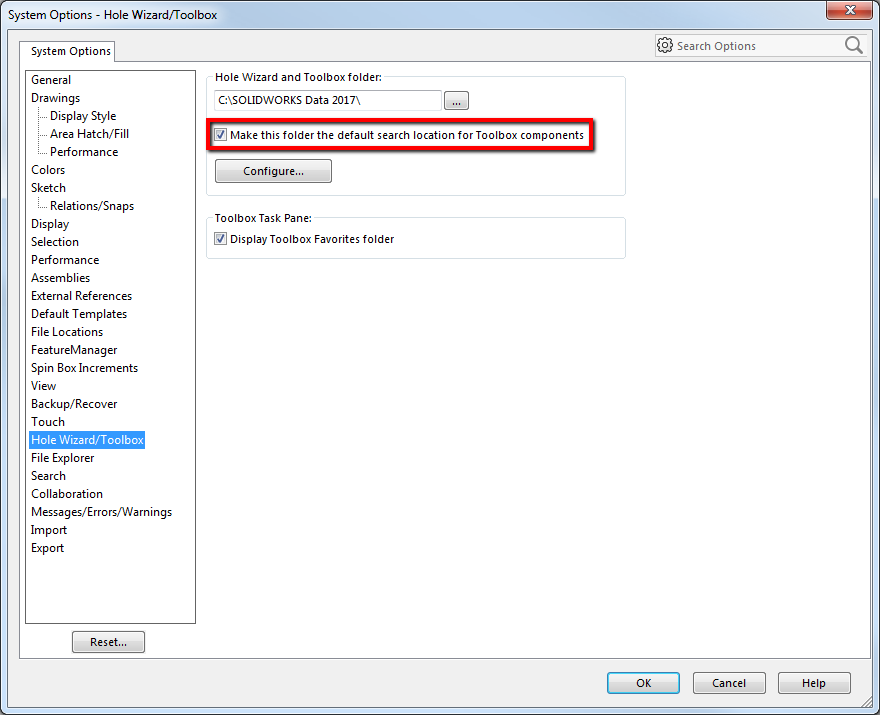
However, if users are using a different Toolbox with this option enabled, SOLIDWORKS could potentially replace the Toolbox component with an incorrect part because of the Toolbox flag. This article goes over how to remove the Toolbox Flag.
Solution
To remove the Toolbox flag from a Part, follow the steps below:
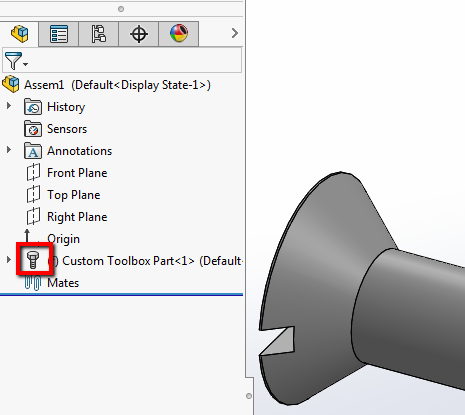
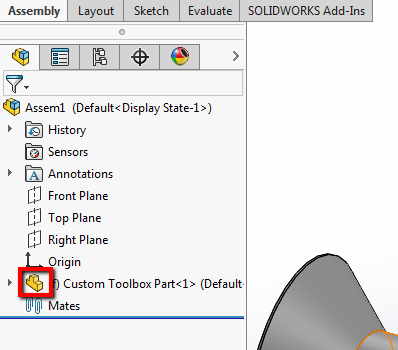
- Identify the component that has a Toolbox flag as indicated by the Toolbox icon in the FeatureManager
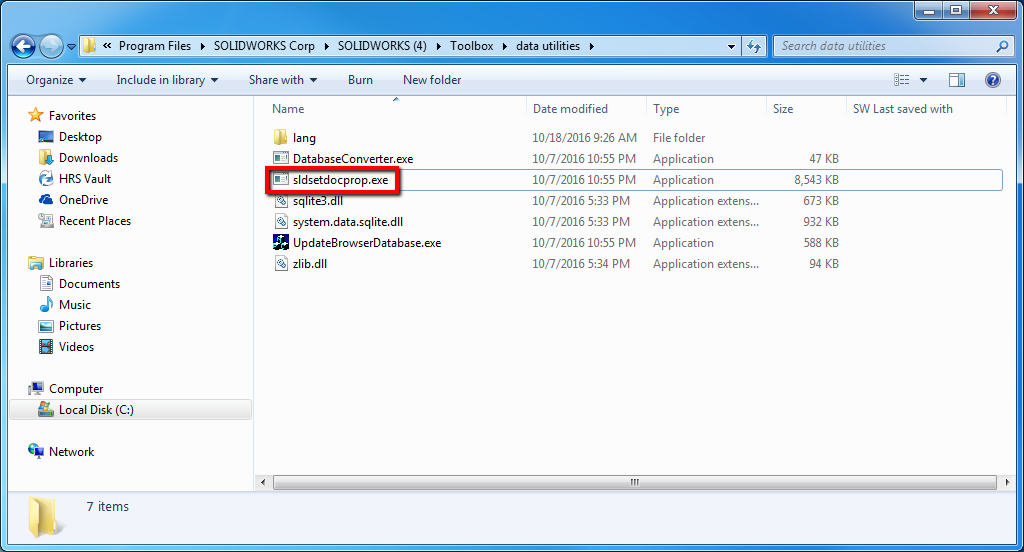
- Browse to C:\Program Files\SOLIDWORKS Corp\SOLIDWORKS\Toolbox\data utilities
- Double-click on "sldsetdocprop.exe"
- Add the files you want to toggle the properties for. A property state of "Yes" means enabling the Toolbox flag, and "No" means removing the flag.
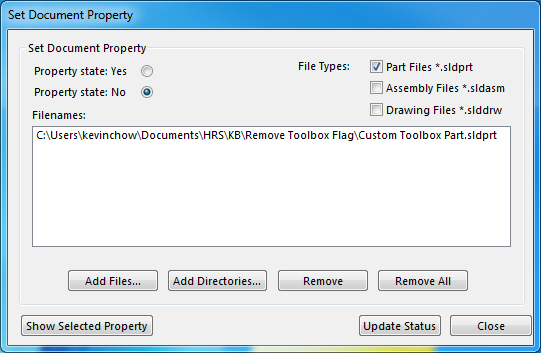
- Click on "Update Status"
- Launch SOLIDWORKS to check the Part file for the Toolbox Flag change
When the Toolbox flag is removed, the icon in the FeatureManager looks like a regular part file.
For additional support, existing customers can submit a ticket or new customers can contact Hawk Ridge Systems.
Comments
Article is closed for comments.